

Crochet Technique: How to Close Rounds When Crocheting in the Round
In this tutorial, discover three different methods to close crochet rounds neatly
when working in the round — perfect for stripes, color changes, and amigurumi projects.
🇫🇷 Vous préférez lire la version française ? C’est par ici !
Nyaossu! ヾ(○・ω・)ノ☆
Here is a new little tutorial about different methods for closing rounds in crochet.
I recently discovered the last method, and it might become one of my favorite techniques to use without moderation. (¬‿¬)
But first, why would we want to close rounds ?
As you probably know, when crocheting amigurumi we usually work in a spiral.
This means crocheting continuously, without actually starting a new round.
In most cases, this works perfectly fine.
However, things can become more complicated when we want to make color changes or achieve a perfectly straight result
( for example when making stripes or certain shapes ).
Of course, there is the invisible color change method, which helps reduce the shift between rounds and makes the transition almost invisible.
But let’s be honest: this technique requires several extra steps and can still remain slightly visible.
For this reason, if your project includes many color changes, closing your rounds may be a better solution.
On the other hand, if color changes are rare, it may not be worth the extra effort.
In the end, knowing several techniques simply gives you more freedom when crocheting.
Here are three methods to close your rounds. (^・ω・^)

The Classic Method :
This is the most commonly used technique.
You start each round with one chain stitch, then finish the round with a slip stitch into the first single crochet.
Many crocheters already know this method, but if you are just starting out, a few extra explanations may help.
Learn to close :
First, create your magic ring as usual, then close it with a slip stitch.
Next, chain one to start the next round.
To begin the second round, insert your hook into the stitch located under that chain stitch — in other words, the stitch where you made the slip stitch.
At the end of the round, you will see the slip stitch from the previous round as well as the small chain stitch.
You should not work into the slip stitch or the chain stitch.
Instead, close the round by making a slip stitch into the first single crochet of the round.
To keep track more easily :
• always count your stitches
• use a stitch marker
Repeat the same process for every round.
Advantage :
Simple and quick to do.
Disadvantage :
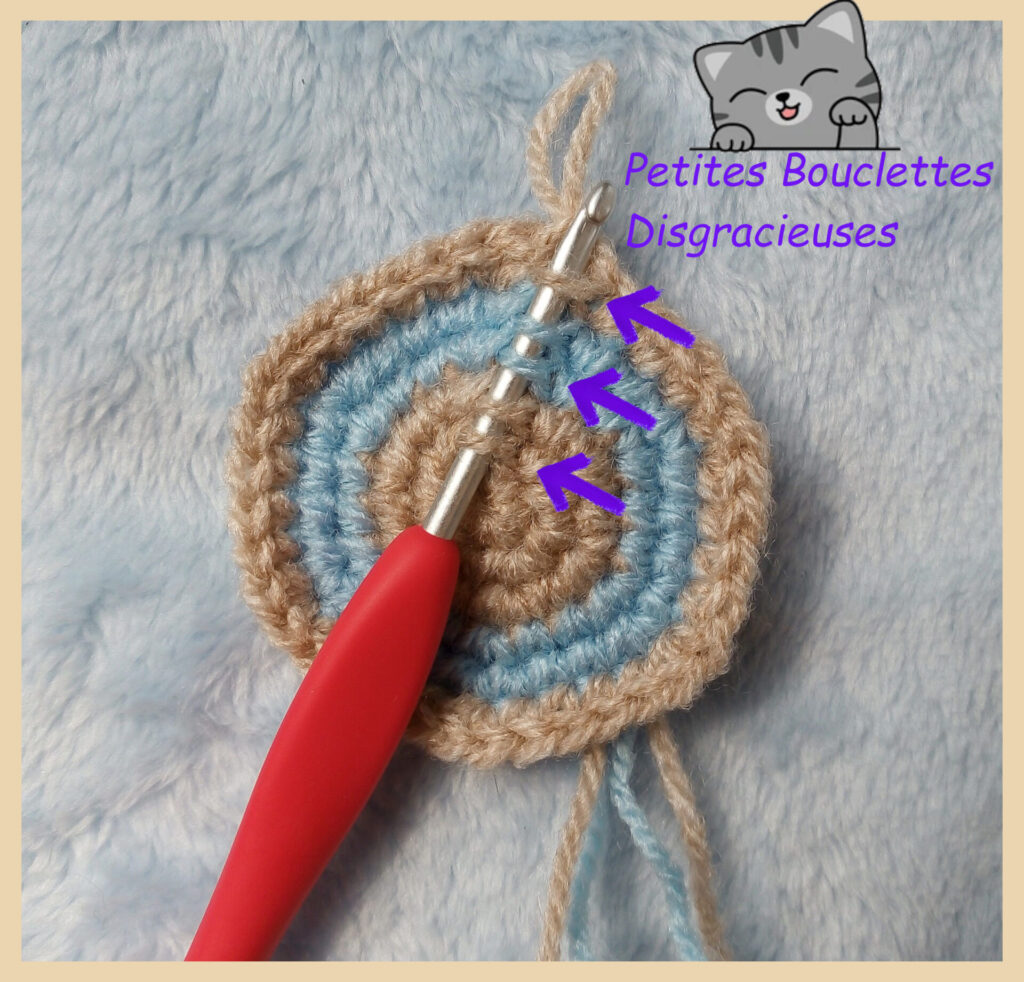
A visible seam remains, creating a small diagonal line along the work.
The False Stitch Method :
With this method, the goal is to create a fake stitch to close the round neatly.
This technique produces a very clean finish and leaves almost no visible seam.
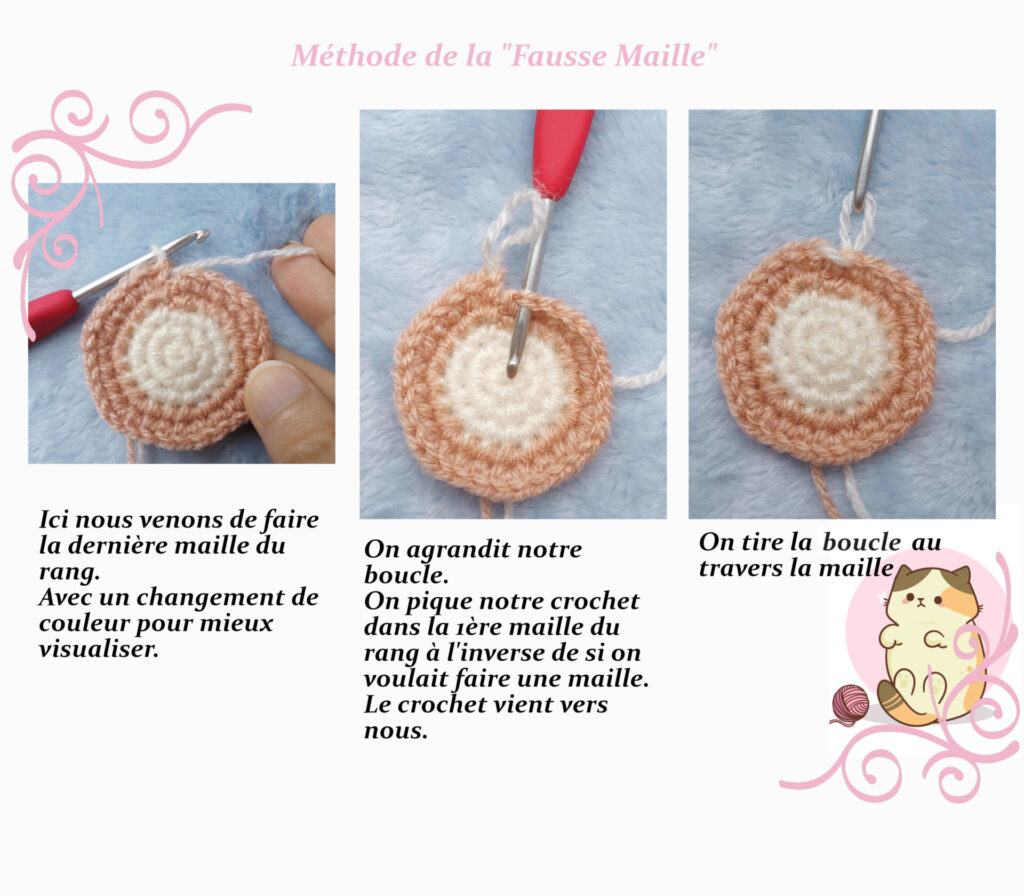
Texte 1
We have just completed the last stitch of the round.
A color change was made to make the steps easier to see.
Texte 2
Enlarge your loop.
Insert your hook into the first stitch of the round,
but in the opposite direction from how you would normally crochet.
The hook comes towards you.
Texte 3
Pull the loop through the stitch.

Texte 4
Insert the hook into the loop you just created
and into the loop behind it.
Texte 5
Tighten everything, yarn over and pull through all loops
as if you were making a regular single crochet.
Your fake stitch is now created.
Texte 6
Final step: chain one to begin the next round.
Make sure to insert your hook into the first stitch of the round
(the same stitch where the fake stitch was made).
Advantage :
Very clean finish with no visible join.
Disadvantage :
A bit technical at first and can feel intimidating when you try it for the first time.
This method does not work well for flat shapes (such as ovals) where perfect symmetry is required.
The No-Chain Method
With this technique, the idea is to shift the beginning of each round by one stitch.
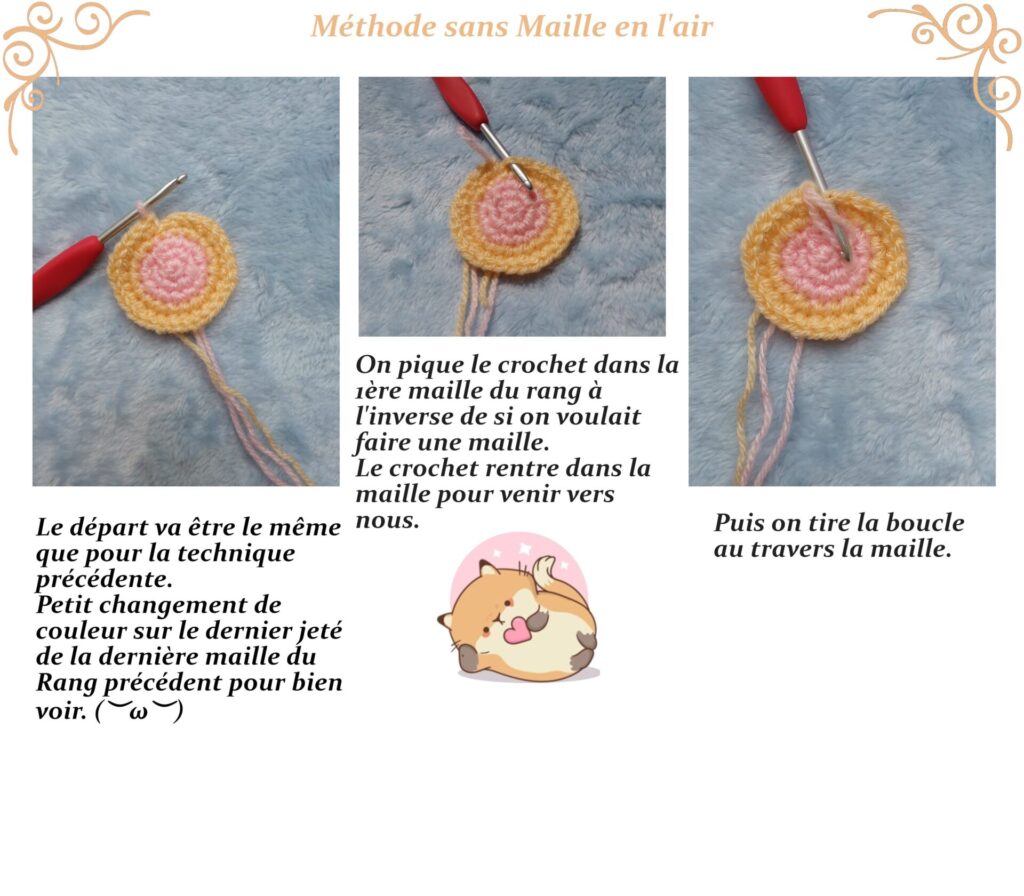
Texte 1
The beginning is the same as in the previous technique.
A small color change was made on the last yarn over
of the previous round to make it easier to see.
Texte 2
Insert the hook into the first stitch of the round,
but in the opposite direction from how you would normally crochet.
The hook enters the stitch and comes towards you.
Texte 3
Then pull the loop through the stitch.

Texte 4
Pick up your yarn normally with the hook.
We are now going to start the next round.
Skip the first stitch (the one where we pulled our loop through).
Texte 5
We are now at the end of the round.
To keep the correct stitch count, we will work the last stitch (or stitches, if it is an increase) into the loops created at the beginning of the round.
Texte 6
These loops are a little tight, so it might be slightly difficult to insert the hook.
This is completely normal.
Advantage :
Just like the false stitch method, the result is very clean with no visible seam.
Disadvantage :
Also slightly technical when first learning it.
You must remember not to work into the first stitch of each round, and instead crochet into the loops created at the end of the previous round.
This technique may therefore require slight adjustments to your pattern, since the first stitch is shifted to the end of the round.
Personally, I see this technique as a simplified and improved version of the previous one.
However, I have not practiced it enough yet to say whether it works for every type of project.
Still, knowing both techniques is a real advantage, especially since they are quite similar. (^ω^)
You are now ready to close the rounds of your crochet projects neatly !
Happy crocheting everyone! ٩(。•ㅅ•。)
SeeYouNextTime !
The blog needs your support!
For tips, click on the little cup (´,,•ω•,,)♥

Thank you so much for your support!
Un commentaire à partager ?