
Crochet Lesson #1: Holding Your Hook & Learning the Chain Stitch
In this first lesson, we will learn how to hold a crochet hook, make a slip knot, and crochet our first foundation chain.
🇫🇷 Vous préférez lire la version française ? C’est par ici !
Nyaossu !
Now that we are properly equipped and familiar with the basic crochet vocabulary, we can finally start the fun part!
In this first lesson, we will learn how to hold the crochet hook, make a slip knot, and crochet our first chain.
Before diving into the chain stitch itself, let’s first learn how to hold our hook and how to make the starting knot.
There are two common ways to hold a crochet hook. You can hold it like :
• A pencil (left)
Your index finger and thumb pinch the hook at the same level, while the hook rests lightly on your index finger.
• A knife (right)
Your index finger sits slightly forward while your thumb rests further back, and the hook is held in the palm of your hand.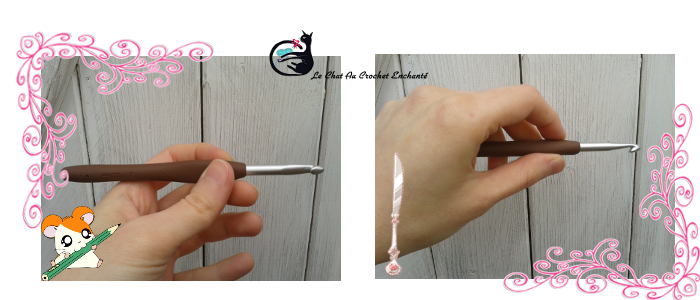
Choose whichever method feels the most comfortable for you!
You can even switch between the two depending on the situation.
Personally, I usually hold my hook like a pencil. However, when working on a very small circle with little space,
I find it easier to switch to the knife grip.
It gives a bit more precision and makes it easier to pull the yarn through tight spots.
Crocheting with the knife grip all the time might be a bit more tiring…
But maybe it just takes practice! I’ll let you experiment and see what works best for you. 😉
Alright! Now that we are holding our precious hook properly, let’s grab our yarn.
We’ll start by making a slip knot.
This knot will serve as the base for our chain stitches (ch), which together will form our foundation chain. Are you still with me? (^・ω・^ )
The chain stitch is the perfect technique for beginners.
It’s simple to learn and great for getting comfortable with holding the hook and yarn.
When starting crochet, it’s best to work on simple projects first. Soon enough, we’ll be ready to crochet amigurumi !
For your very first project, I recommend trying a small and simple applique.
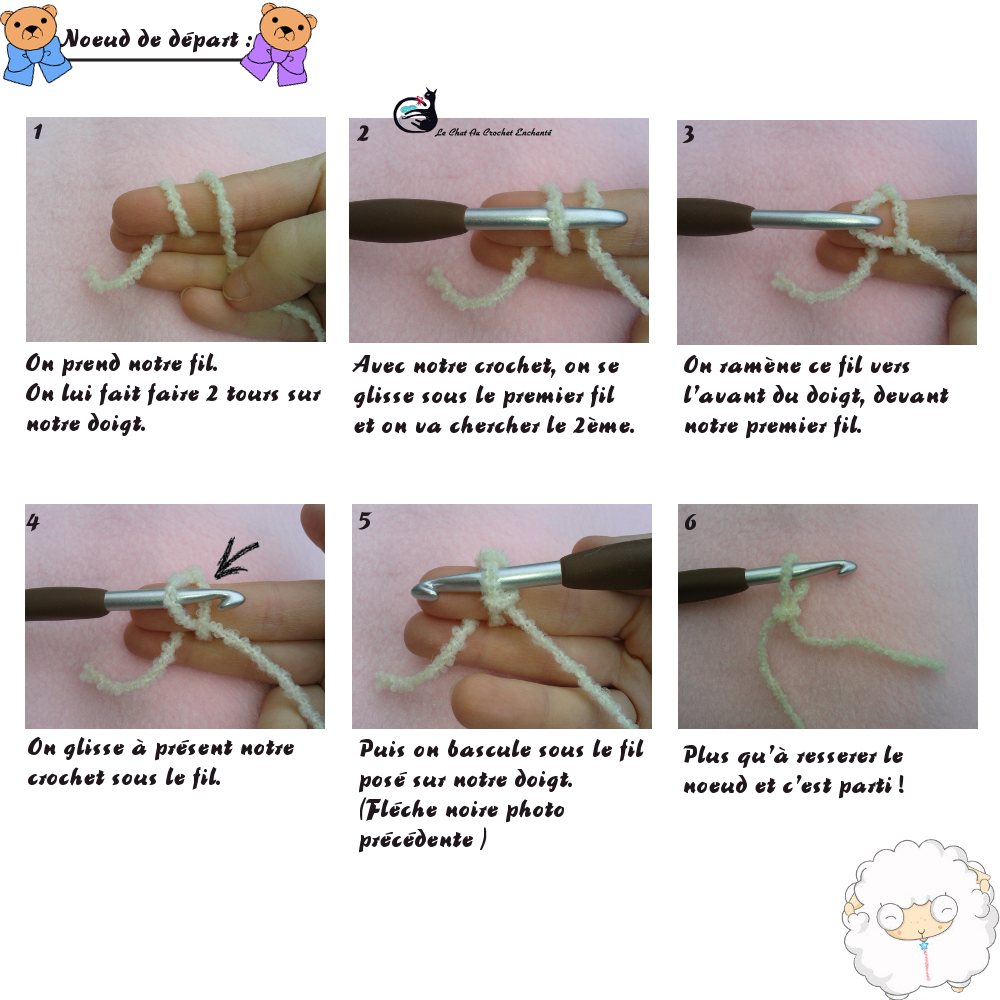
Slip Knot – Step by Step
1. Take the yarn and wrap it twice around your finger.
2. Insert your hook under the first strand and grab the second strand with your hook.
3. Pull this strand toward the front of your finger, in front of the first strand.
4. Slide your hook under the strand again.
5. Then rotate the hook under the strand resting on your finger (black arrow in the previous picture).
6. Tighten the knot and you’re ready to start !
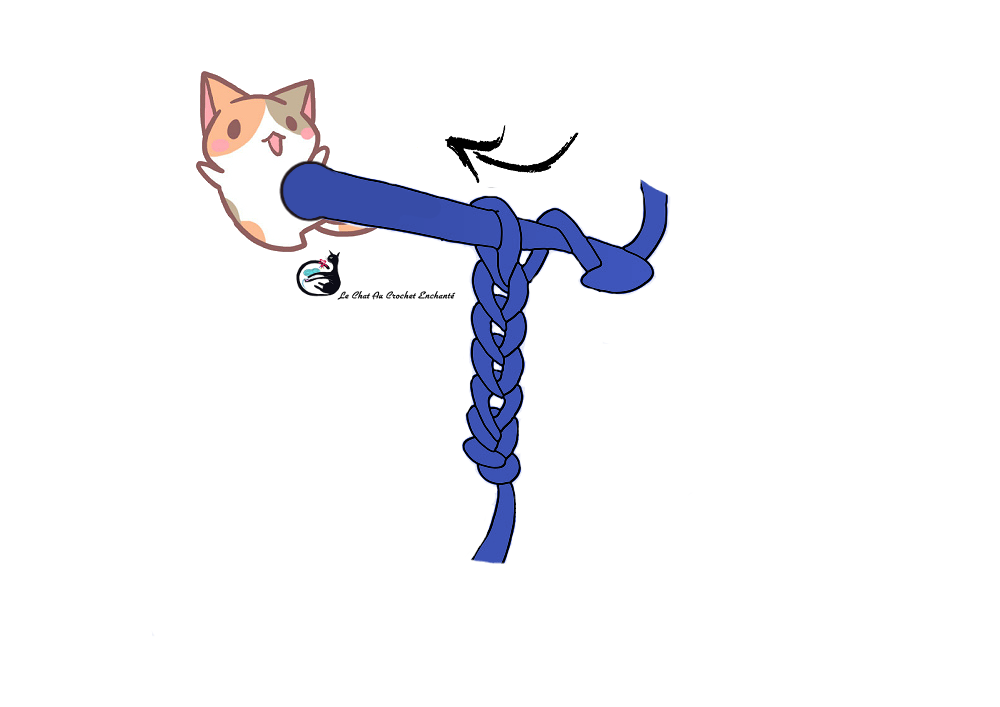
Once your slip knot is made, simply yarn over and pull the yarn from your ball through the loop on your hook.
Repeat this movement to create your chain stitches, until you reach the desired number.
This chain will serve as the foundation for a back-and-forth crochet project, such as a small fish applique for example.
It will also allow us to practice and learn our first real crochet stitch: the single crochet.
Next lesson
👉 Lesson n°2 – Single crochet & Working into the foundation chain
SeeYouNextTime !
The blog needs your support!
For tips, click on the little cup (´,,•ω•,,)♥

Thank you so much for your support!
Un commentaire à partager ?