
Crochet Lesson #7: Edge Double Crochet ( or False Double Crochet )
🇫🇷 Vous préférez lire la version française ? C’est par ici !
Nyaossu!
Today, we’re back with a little “technique & tips” article.
Mr. Moustache Kibrille is, of course, back to explain everything !
We’re going to talk about edges and borders for crochet projects made with double crochet stitches.
These techniques can also be adapted for projects made with half double crochet.

When crocheting rows in half double crochet or double crochet, the classic method at the end of a row is to make turning chains matching the height of the stitch:
ch 2 for hdc, ch 3 for dc.
The problem with this technique is that it creates gaps in your work (let’s be honest—it makes holes!).
On top of that, your edges can end up looking uneven.
There are several alternative techniques you can use, such as “false stitches” (or stacked stitches), which are very helpful for achieving neat, clean finishes.
I’ll go over 3 of them here to give you a few options to choose from. ヽ(^▽^)人(^▽^)/
The most important thing is that you feel comfortable with the technique and like the final result.
The names of these techniques are just there as references to describe them—I came up with them myself.
They don’t have official names.
*ੈ✩‧₊˚༺☆༻*ੈ✩‧₊˚
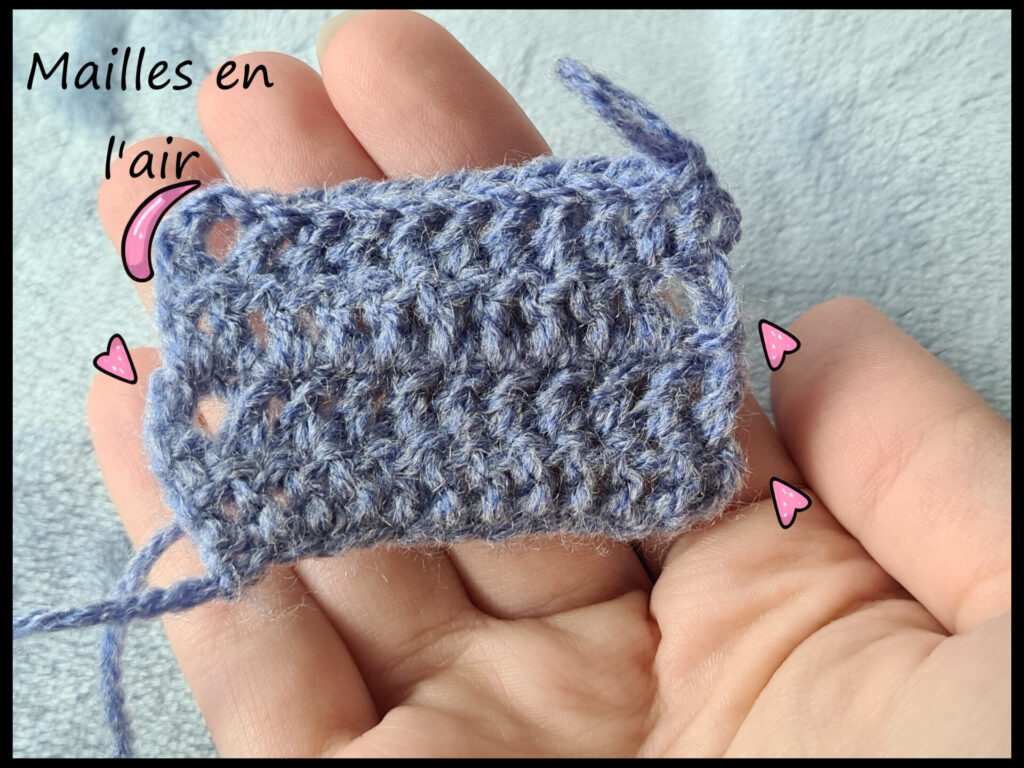
Classic method with turning chains
Let’s start with the classic method, which can absolutely do the job depending on your project.
As always, these techniques are here to improve your finishing and should be used depending on the situation.
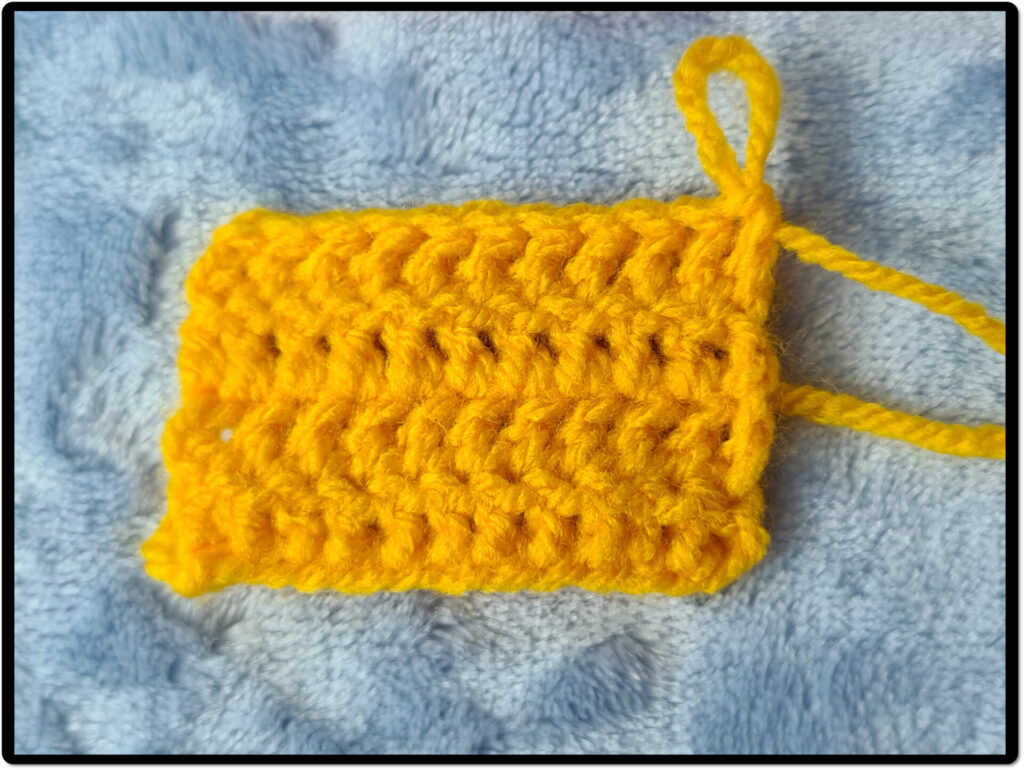
As you can see in the photo, the ch 3 at the beginning of each row creates bumps and leaves holes in your work.
The edges are uneven, which can sometimes be an issue.
*ੈ✩‧₊˚༺☆༻*ੈ✩‧₊˚
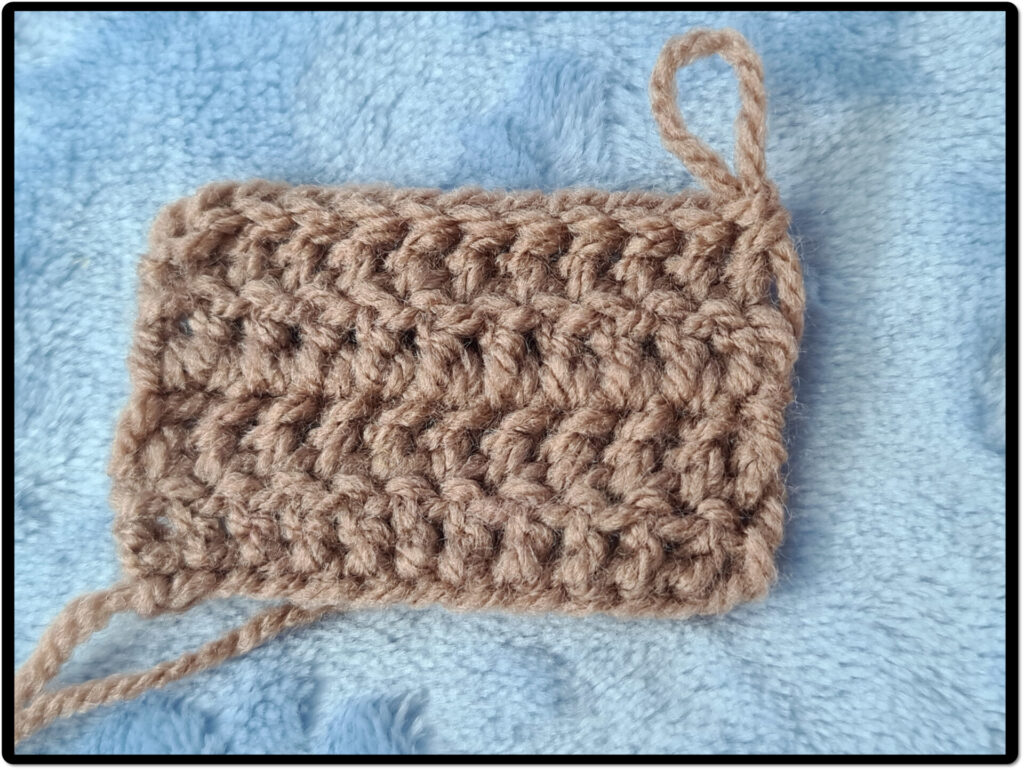
Method 1: Stacked single crochet
For this first method, we’re simply going to replace our turning chains with a stacked single crochet !
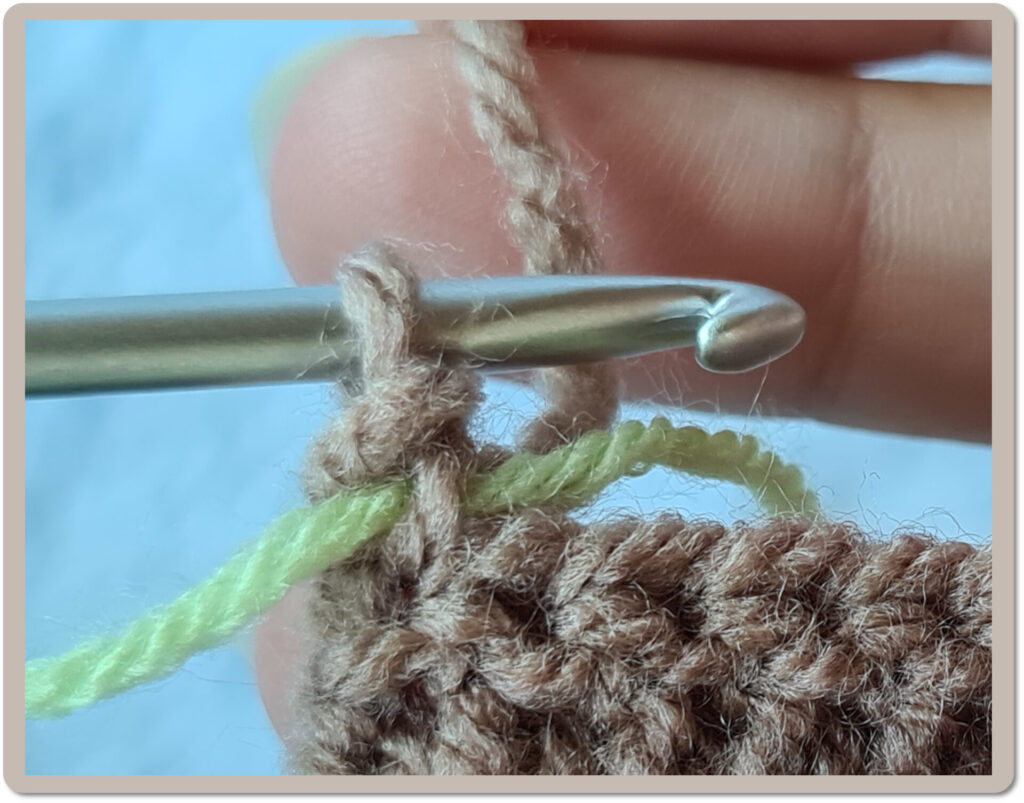
Slightly elongate your loop to turn, then make a single crochet in the first stitch.
Once that single crochet is done, we’re going to give it height by crocheting a second single crochet on top of it.
To do this, we’ll use the side strand located just below the top loops of the stitch
( see photo—the strand where the green yarn passes ).
The only small “downside” of this method is that at the beginning, if you’re not careful and don’t count your stitches, you might be tempted to crochet into the lower single crochet and end up off at the end of the row.
Just keep it in mind and you’ll avoid the mistake
*ੈ✩‧₊˚༺☆༻*ੈ✩‧₊˚
Method 2: Twisted long loop
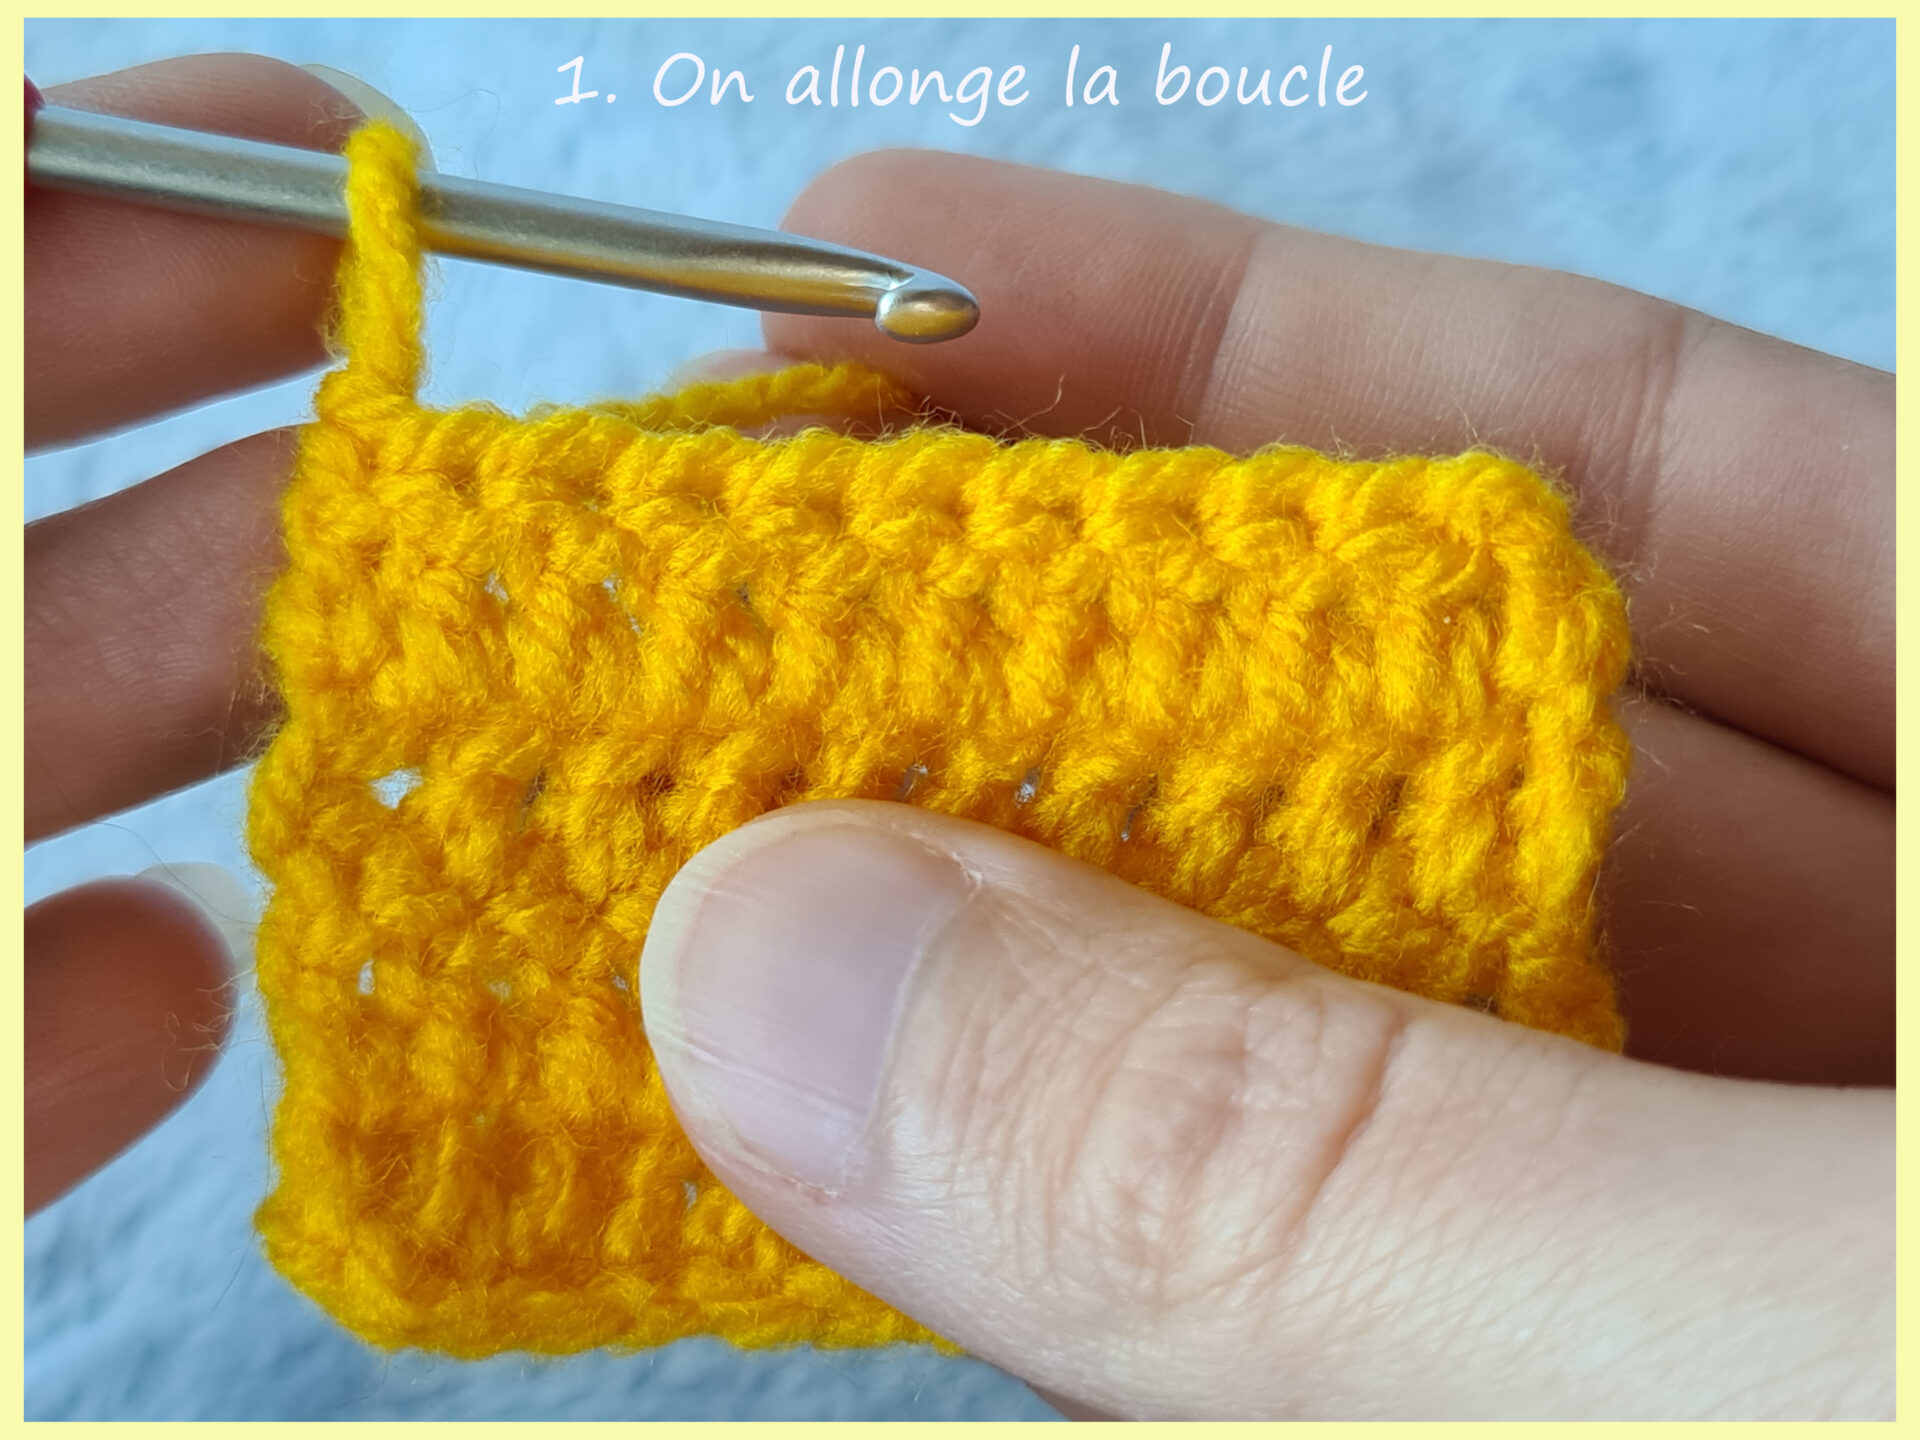
For this method, we start by elongating the loop on the hook.
At first, this technique can feel a bit intimidating—you’re not always sure how long the loop should be, and it can be tricky the first few times.
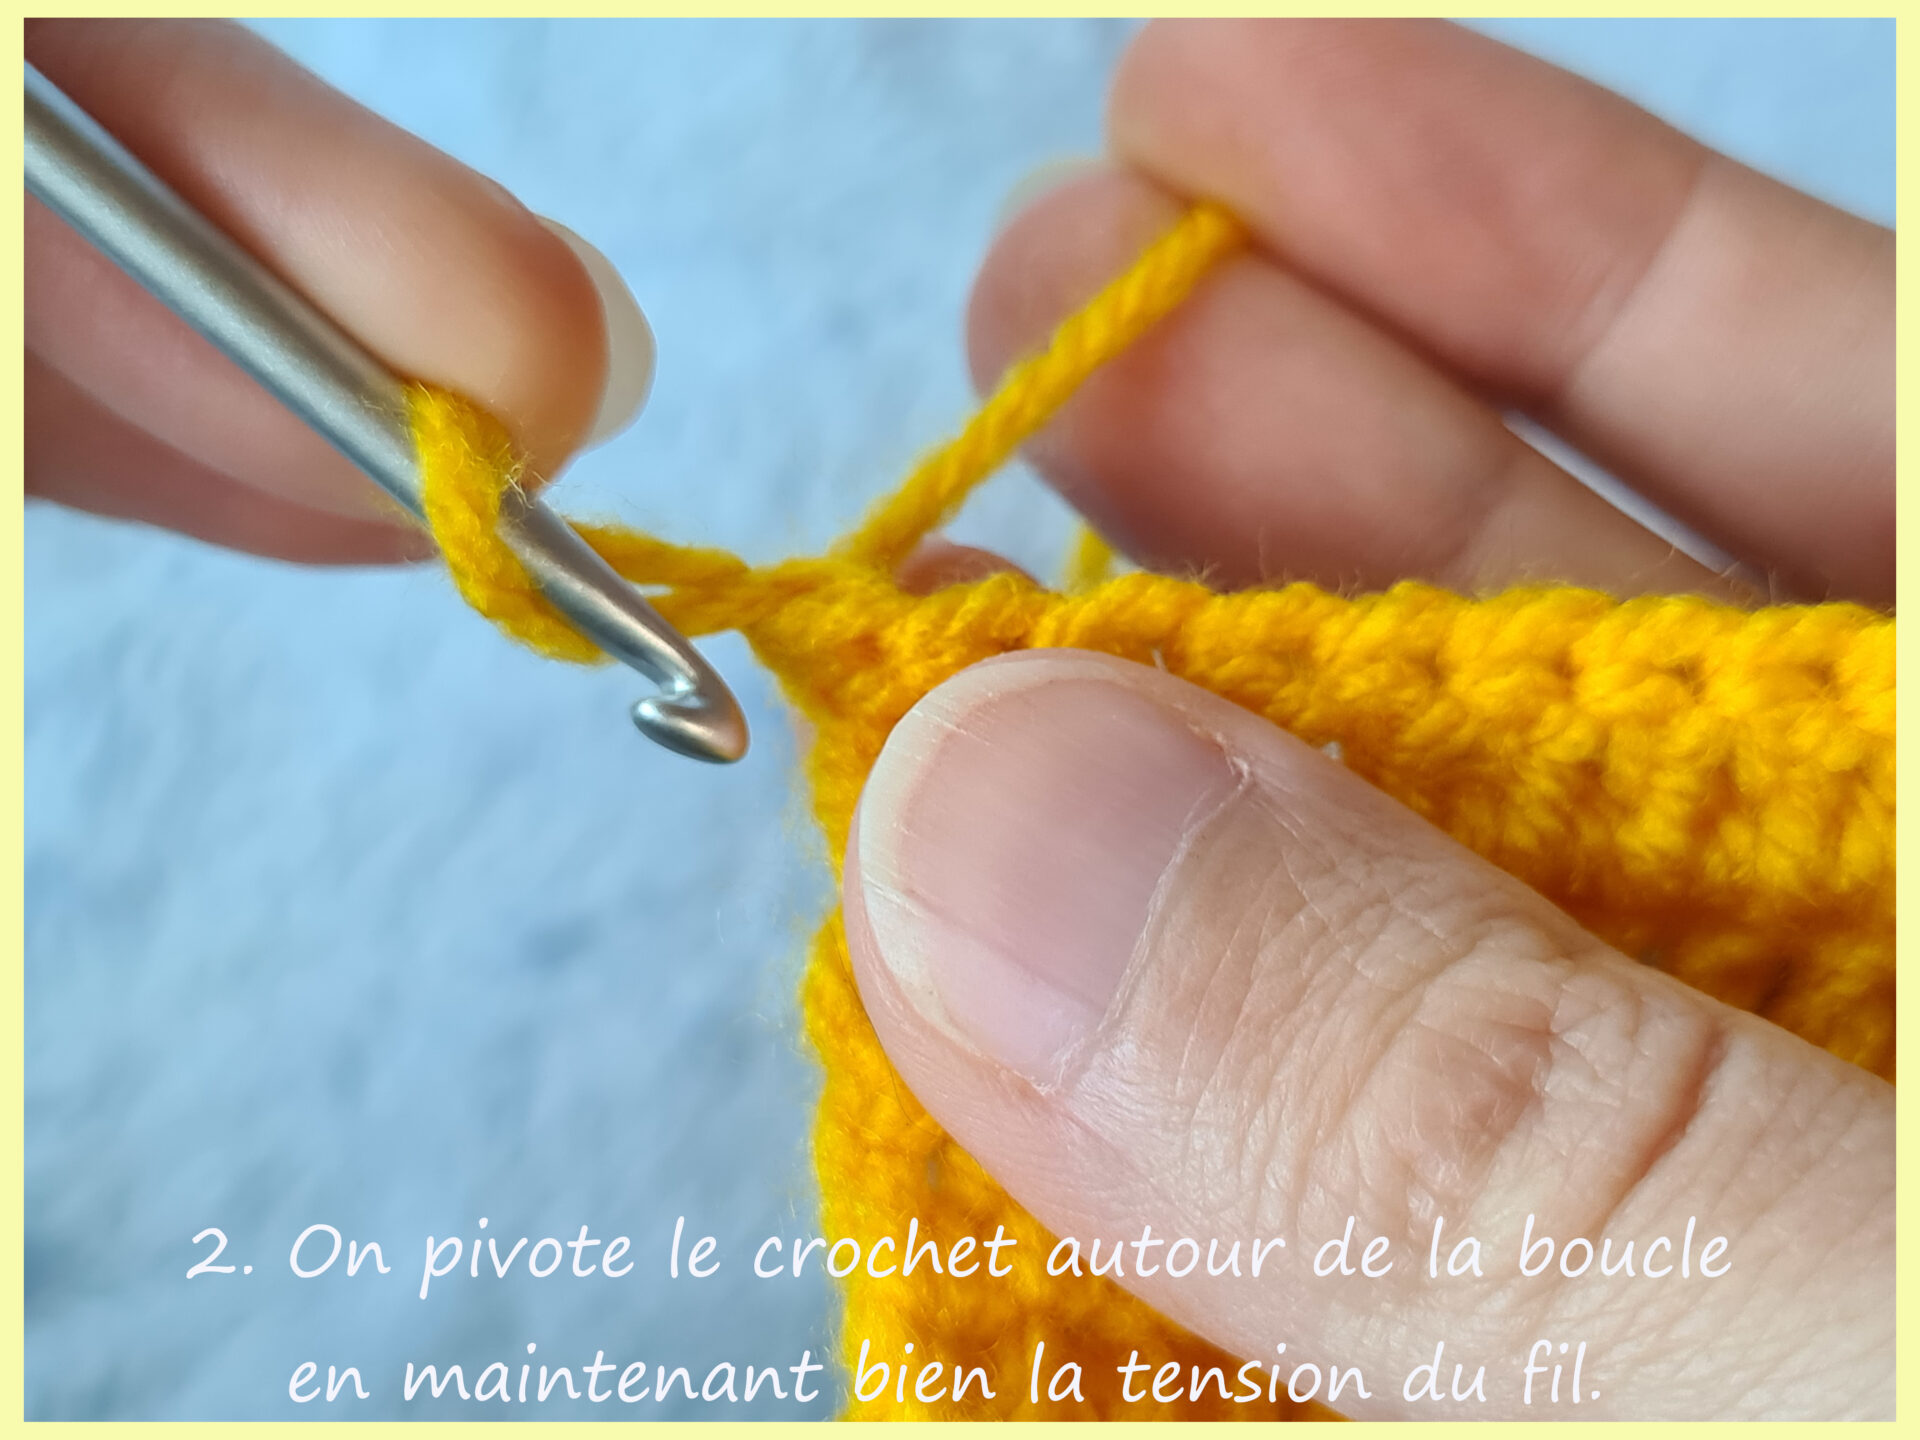
Once your long loop is ready, rotate the hook around it :
go behind the loop and bring the hook back to the front.
Hold the yarn in place with your finger so it doesn’t slip.
Then yarn over, pull through one loop, yarn over again, and pull through the two remaining loops.
This edge stitch replaces your first double crochet—it serves the same purpose as turning chains.
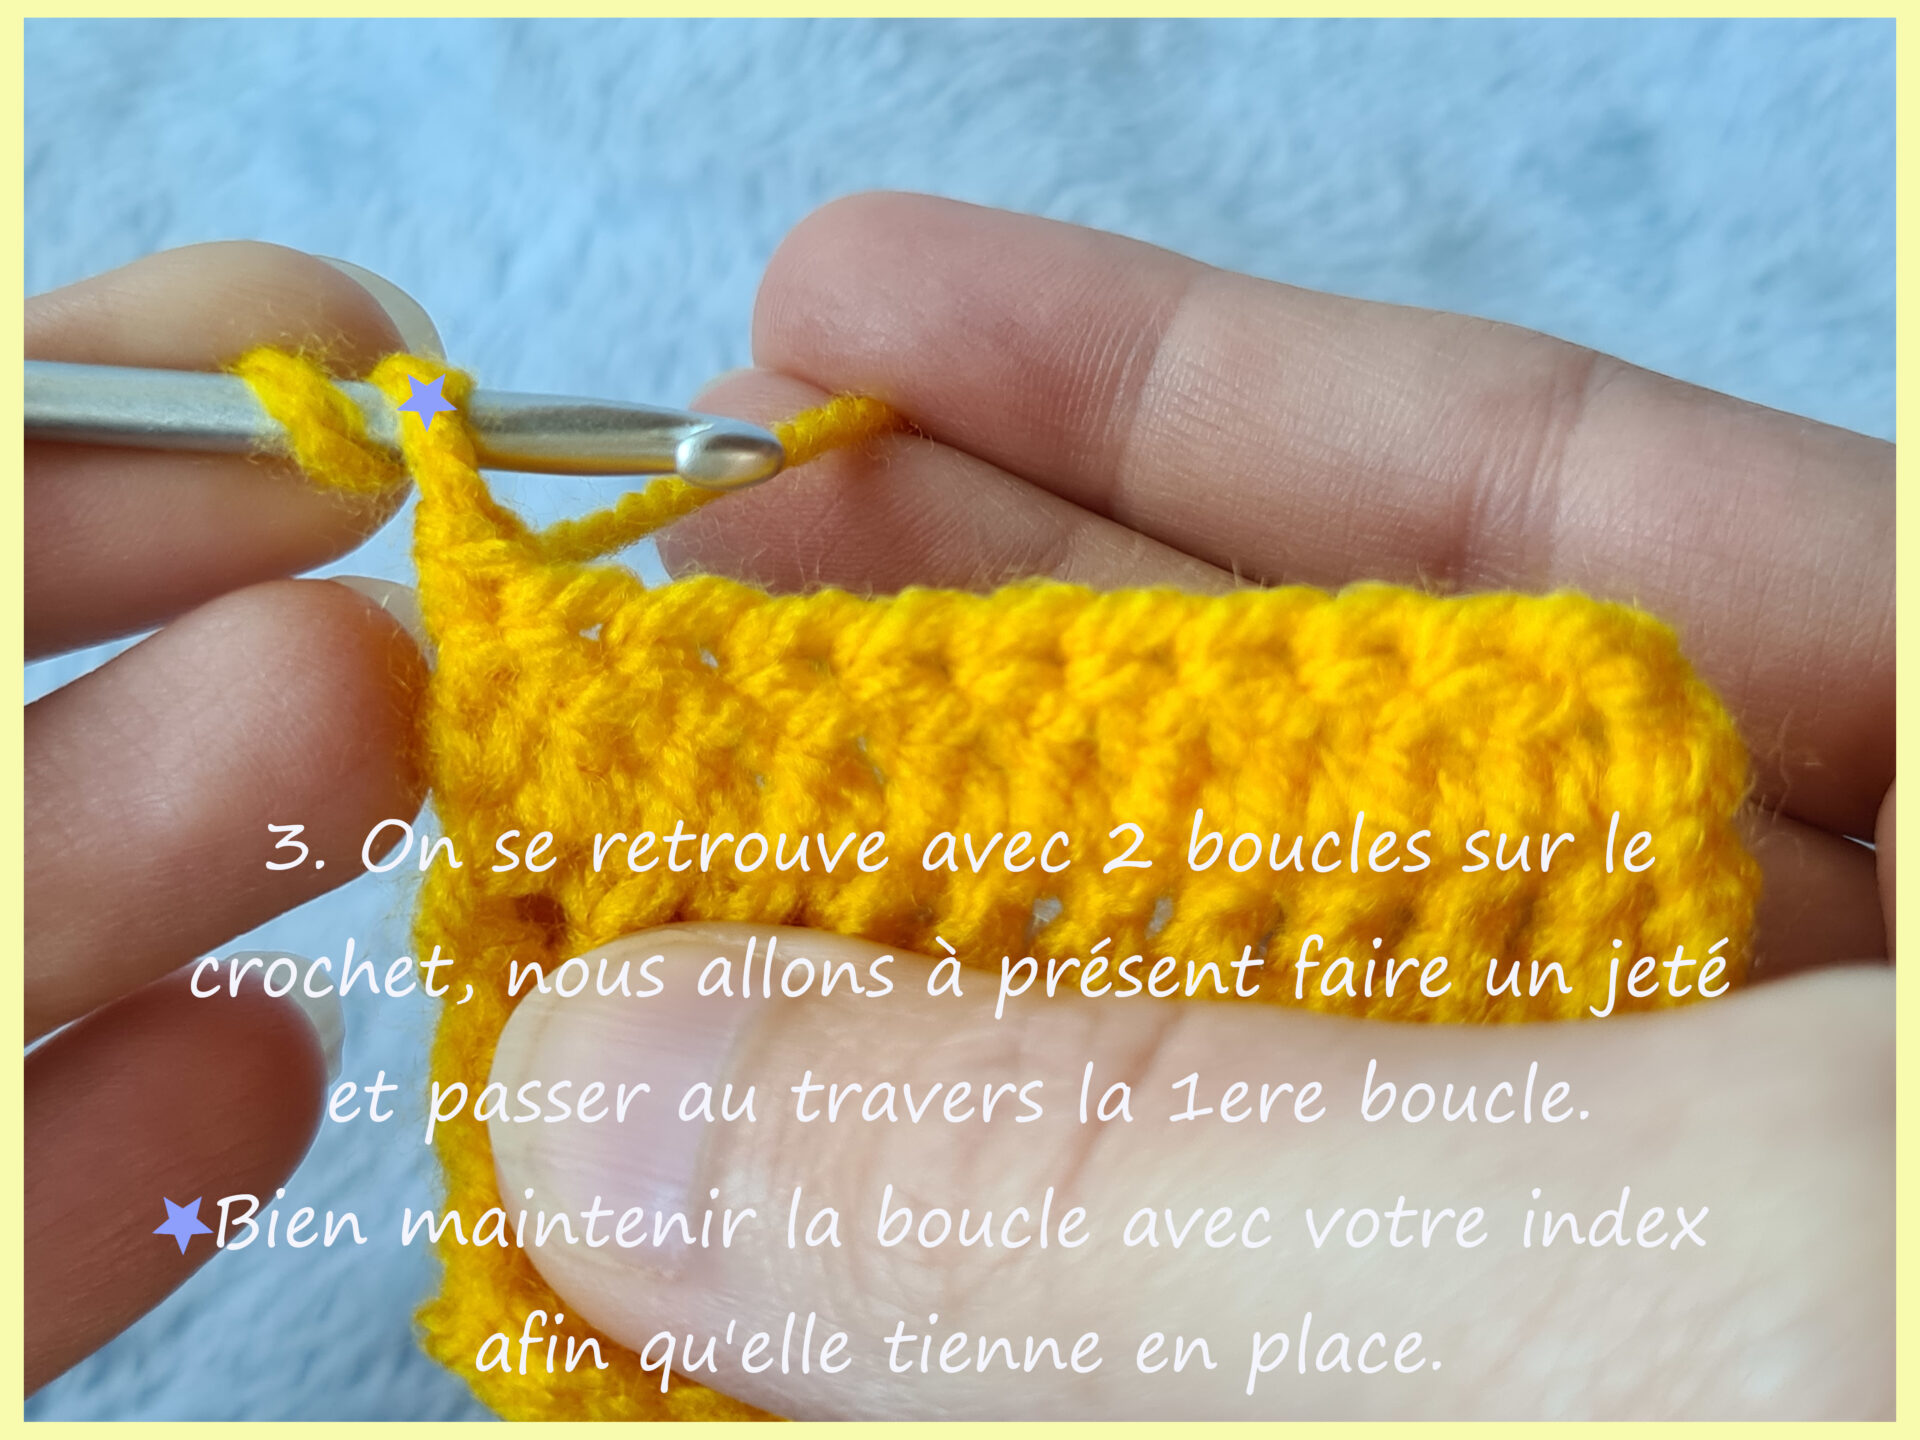
Hold the loop in place with your finger so it doesn’t slip.
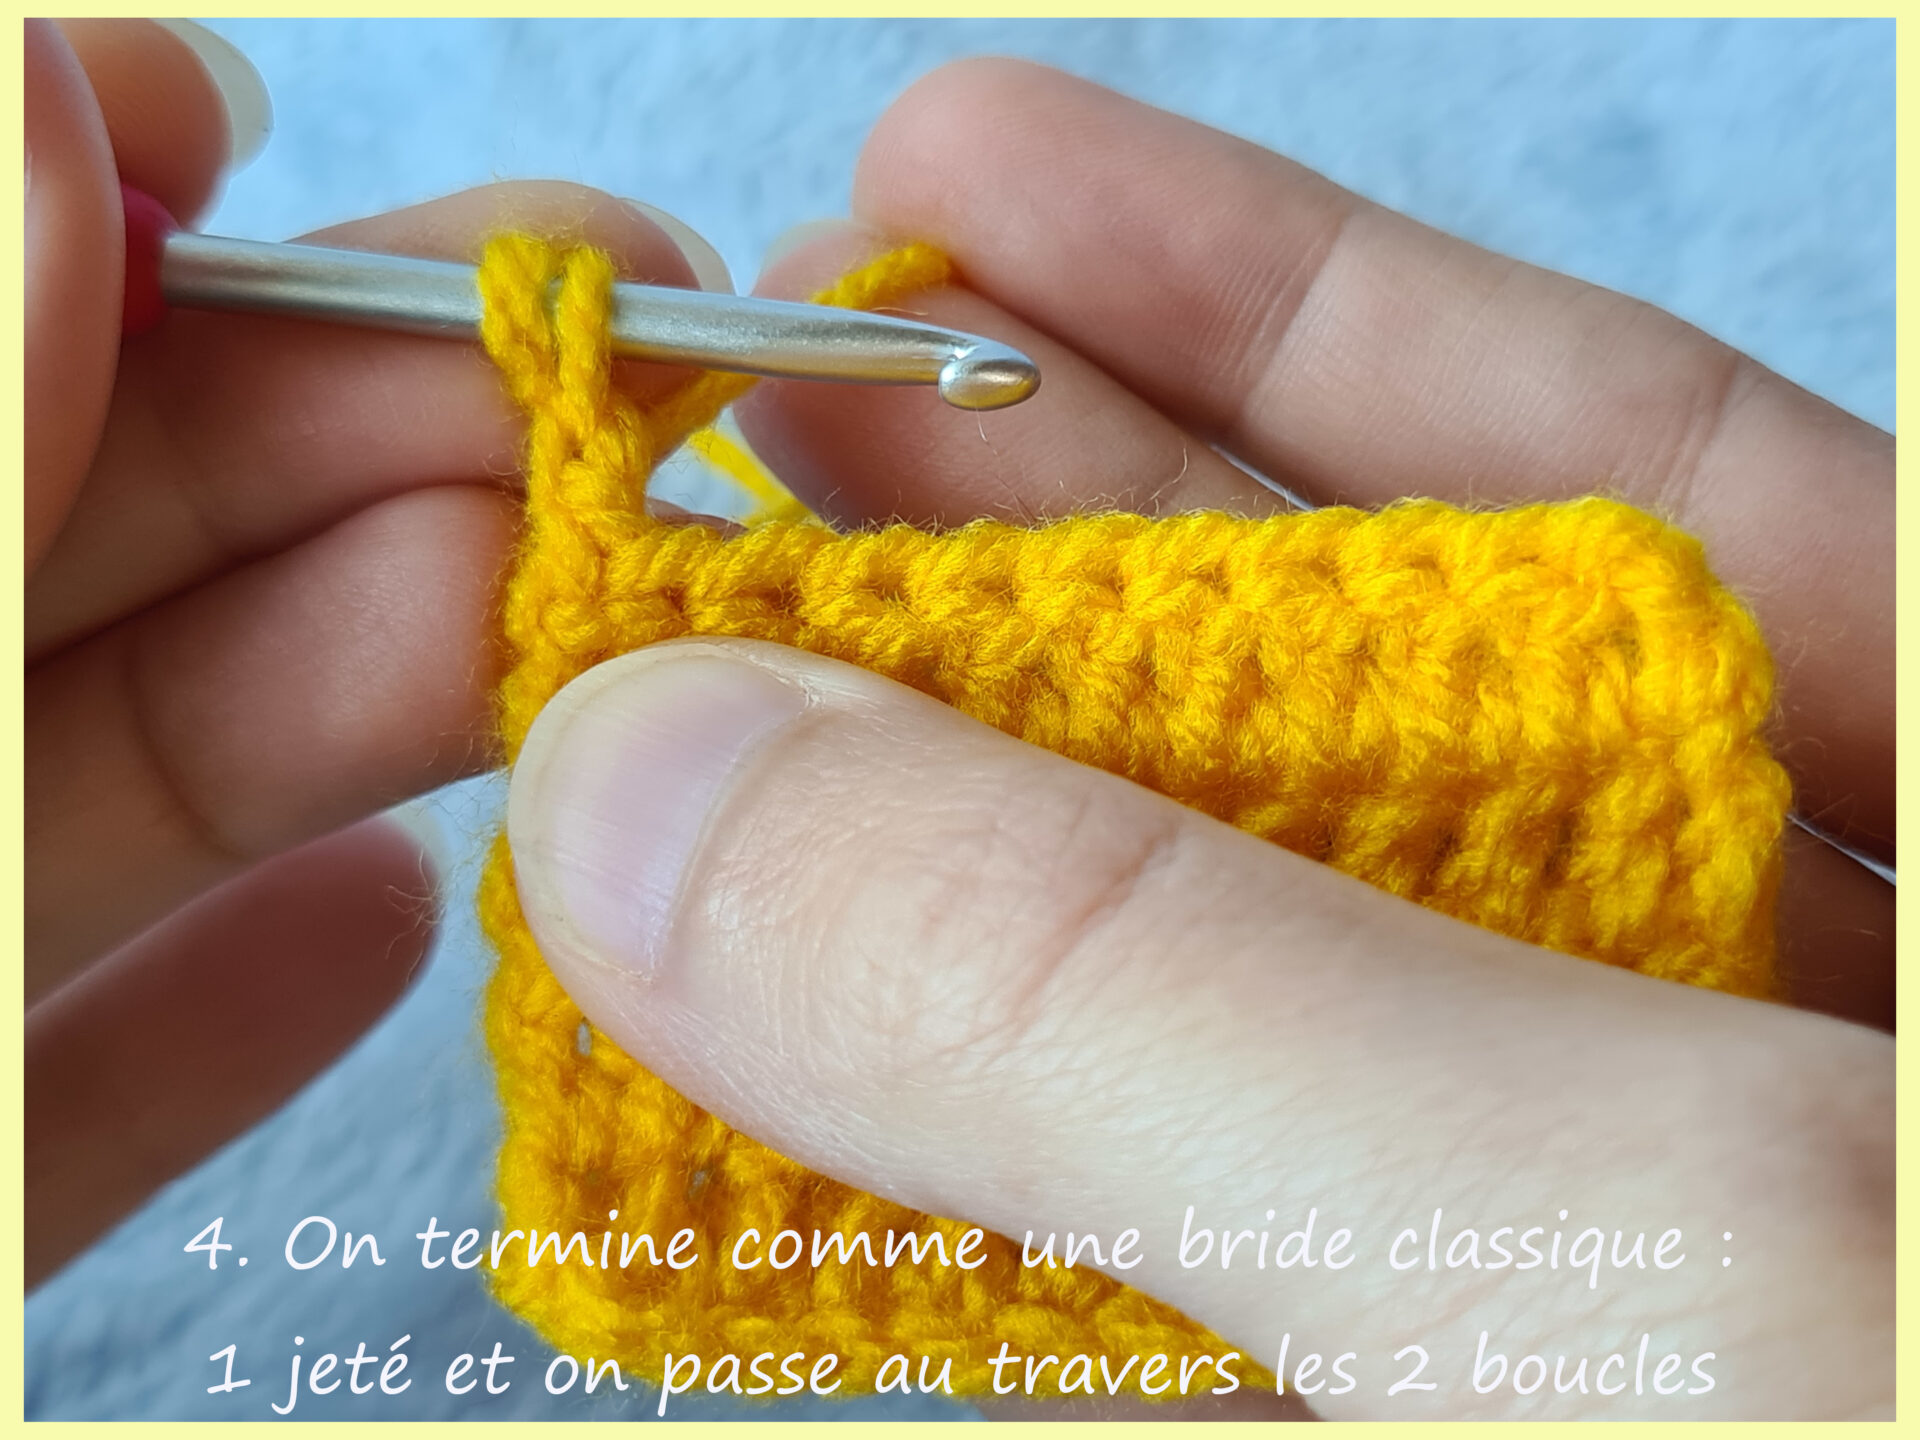
yarn over and pull through both loops.
*ੈ✩‧₊˚༺☆༻*ੈ✩‧₊˚
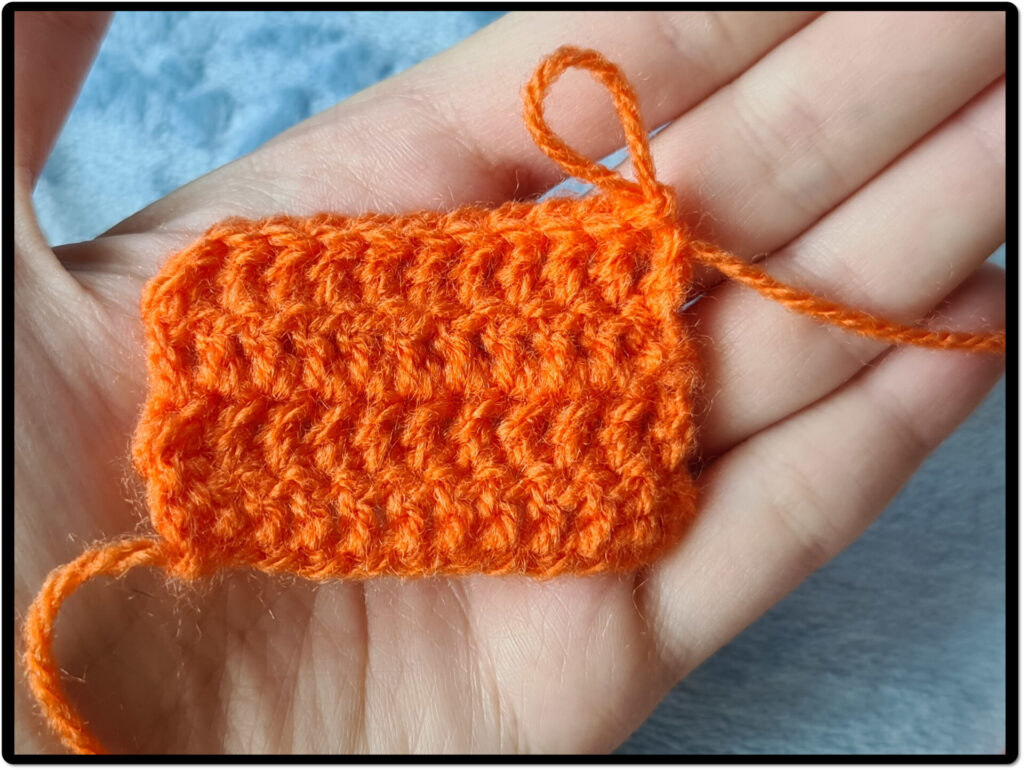
Method 3: Twisted strand
For this method, I personally find it a bit easier than Method 2.
It really comes down to preference—the three methods shown here all work very well. (◜௰◝)
Just like with the other methods, start by slightly enlarging your loop.
Then grab your yarn, pull it toward the outside of the work, and bring it to the front.
Rotate it so that it sits neatly in front of your loop.
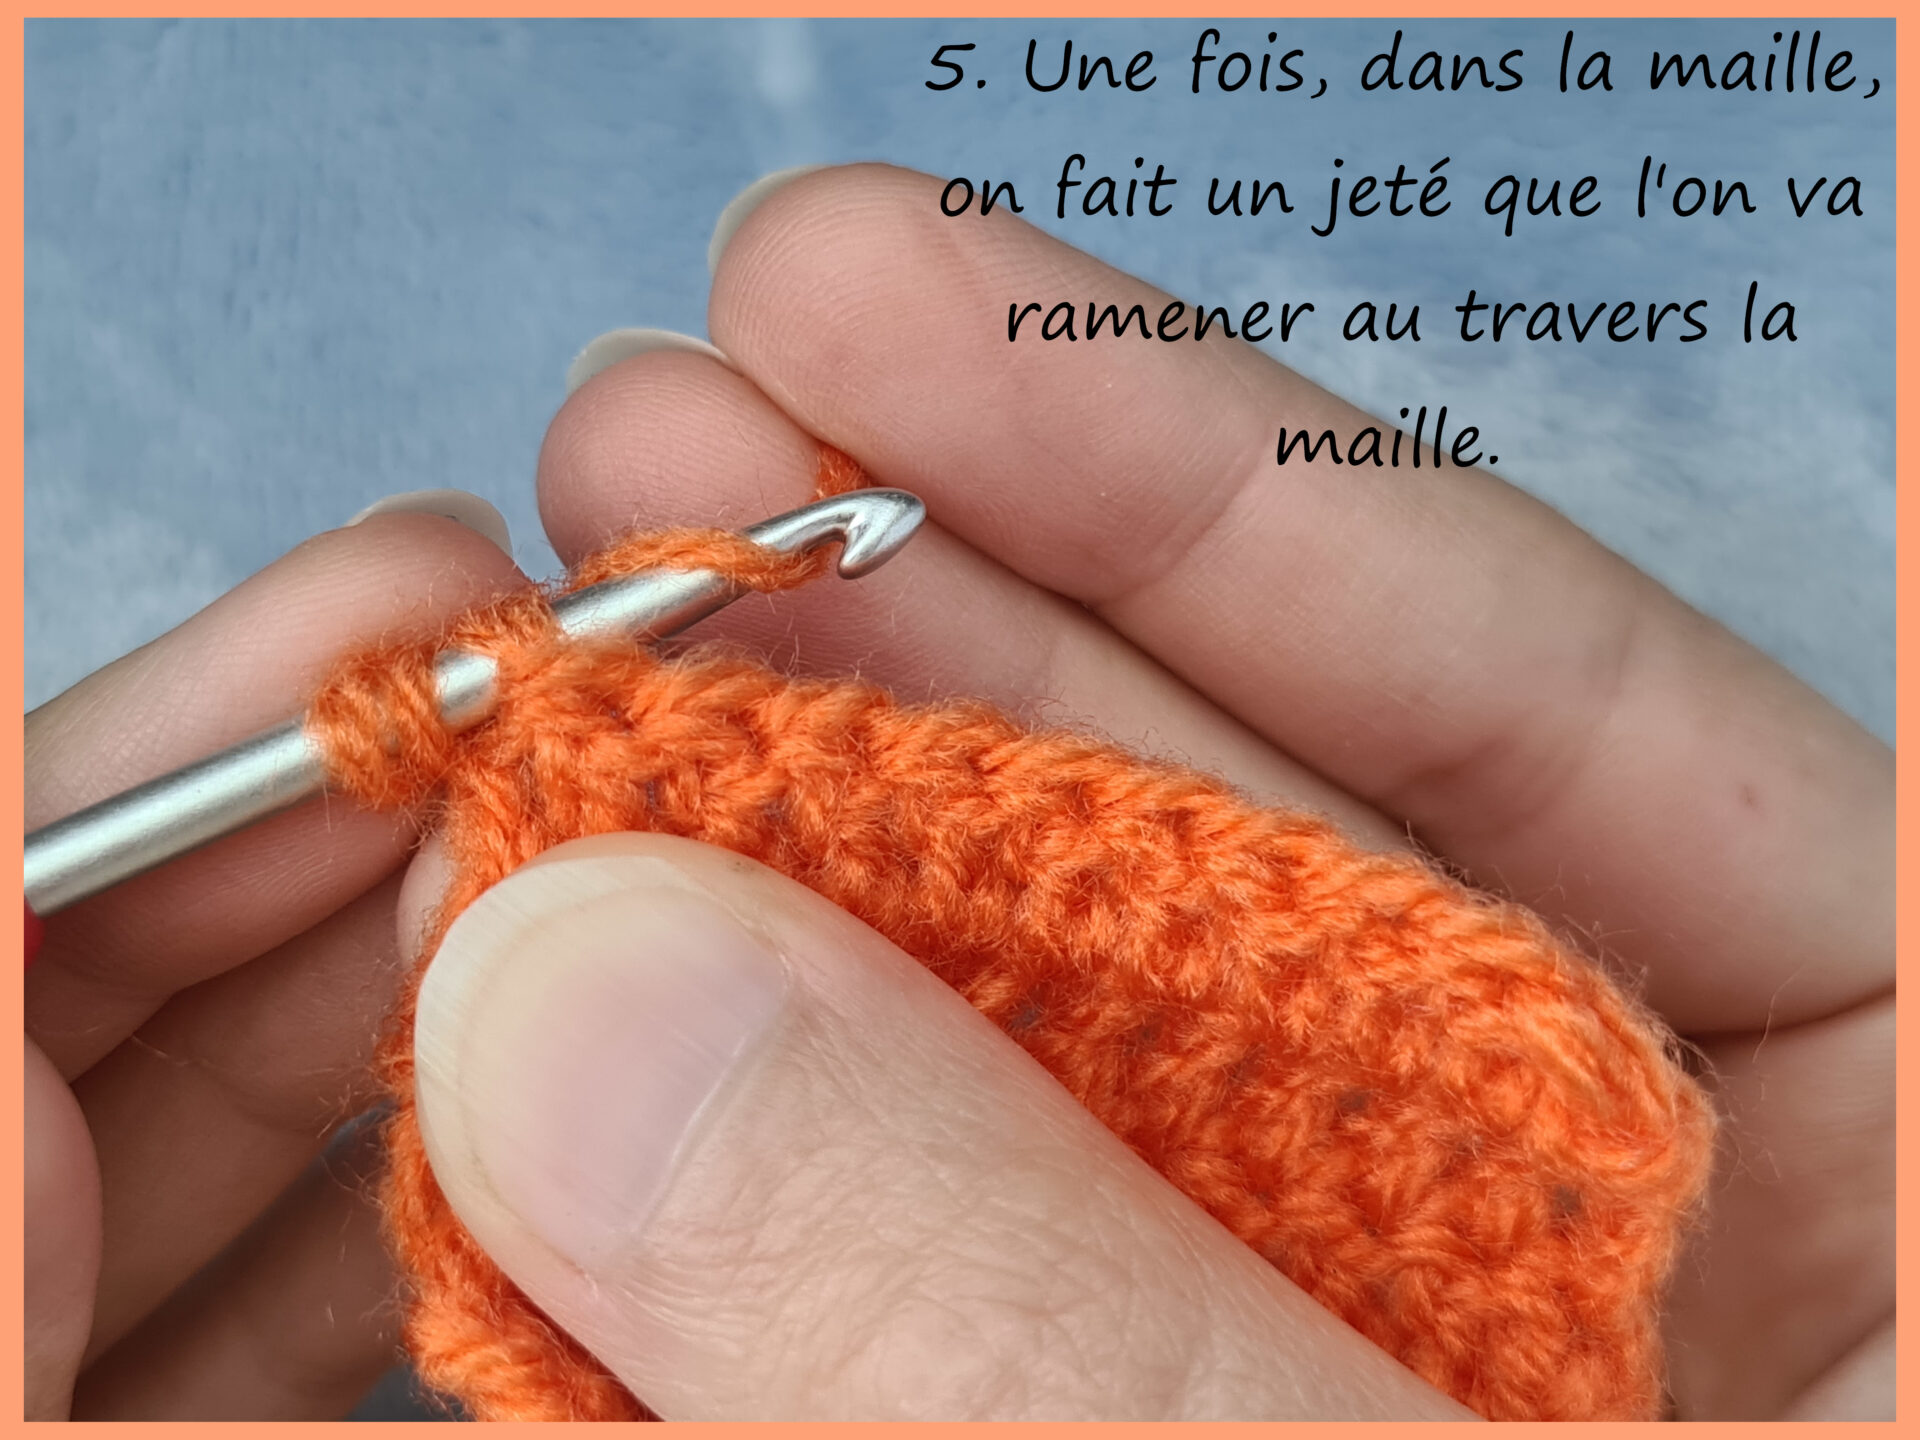
Insert your hook into the stitch and pull the yarn through your loops
(in one or two steps depending on whether you’re working hdc or dc).
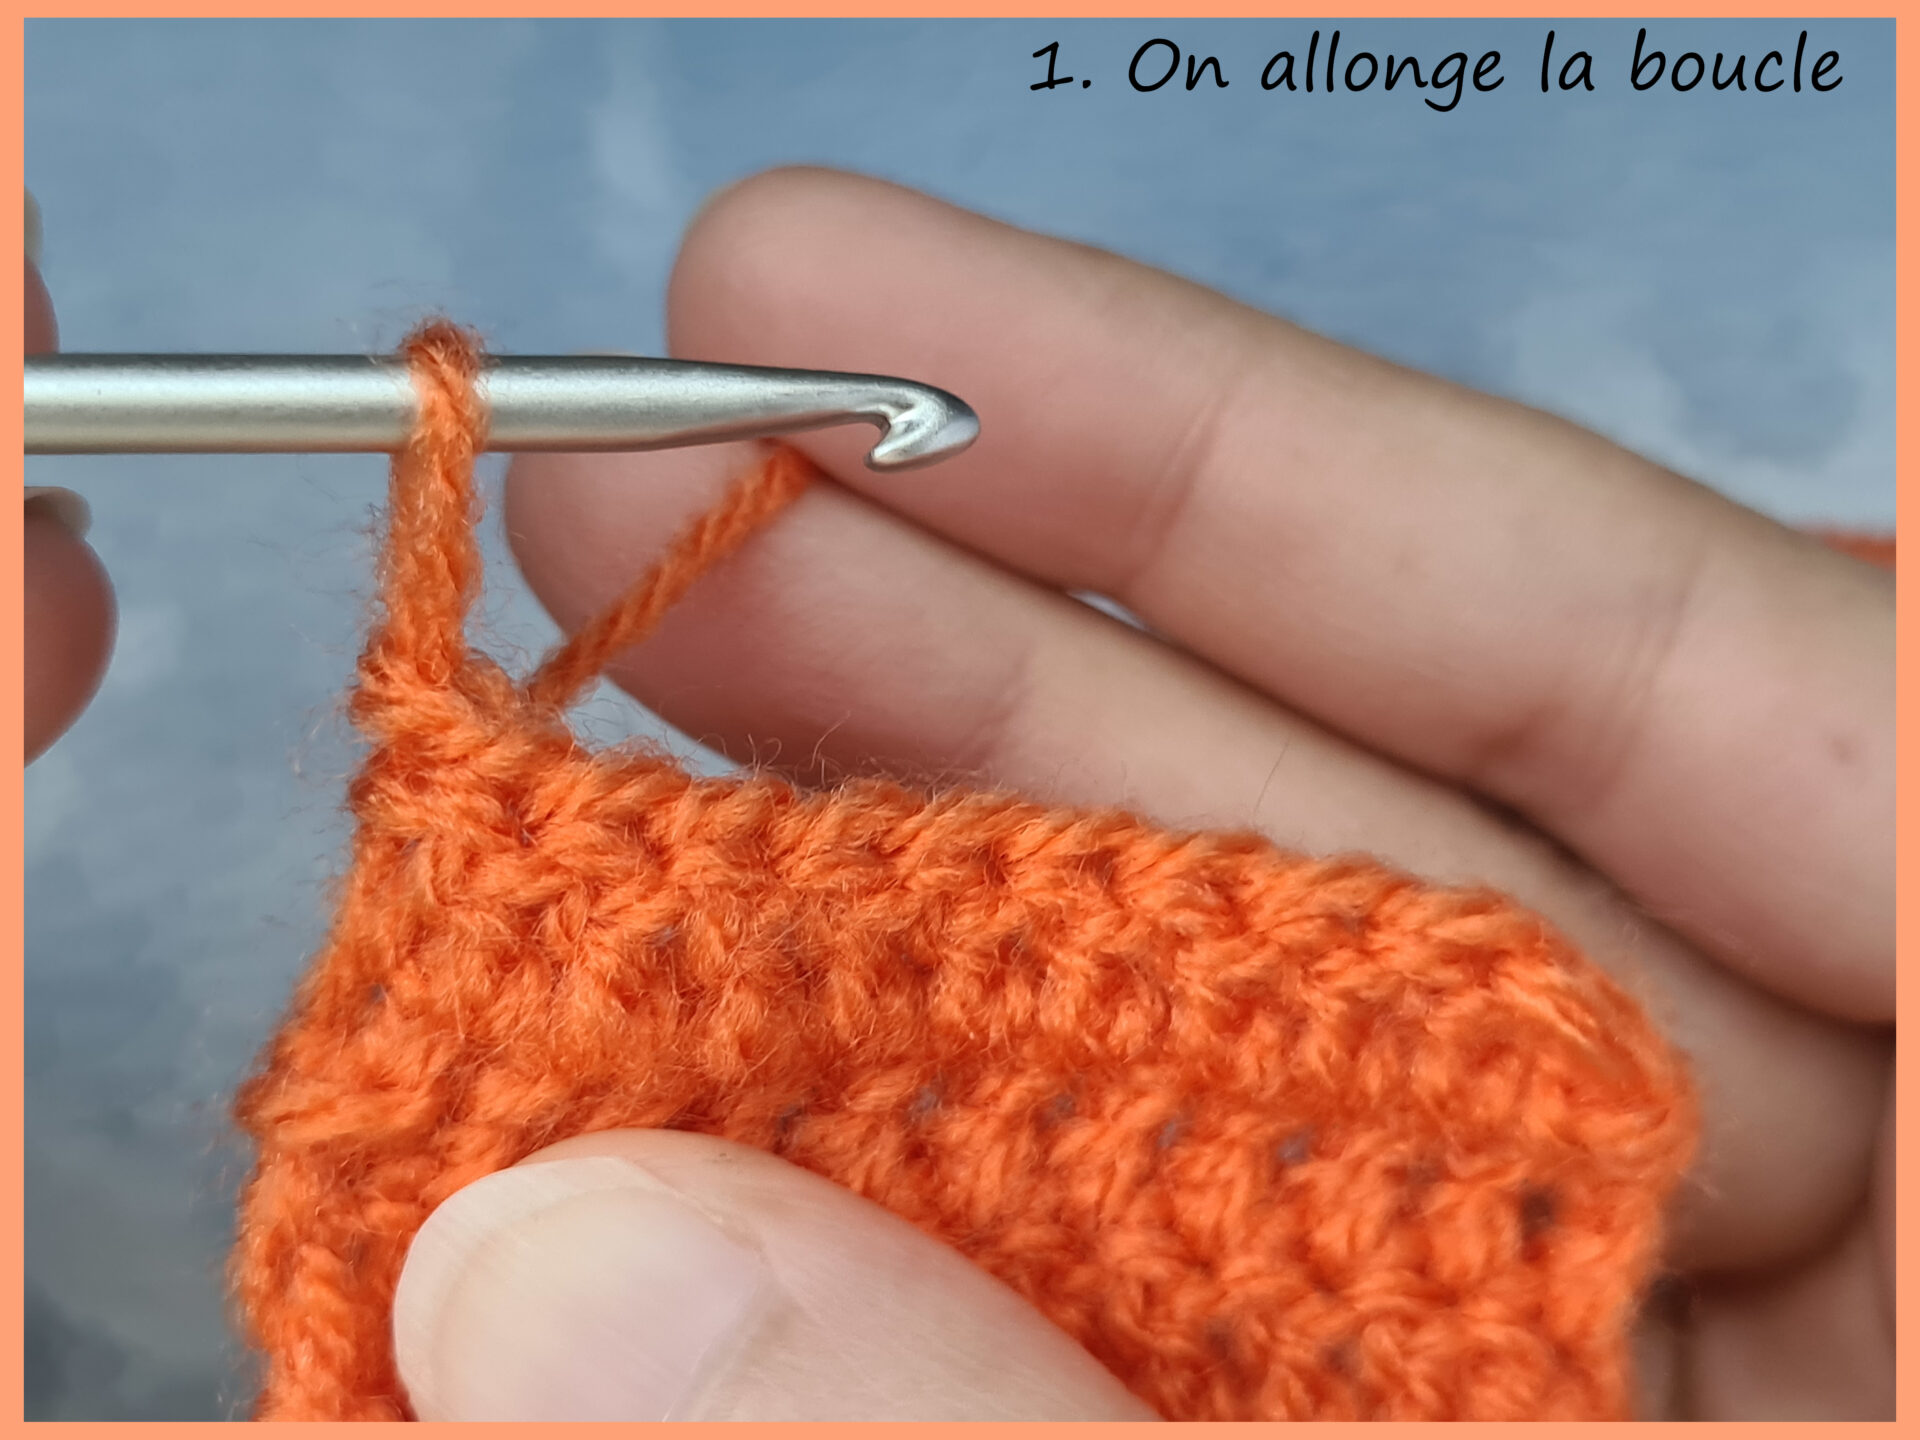

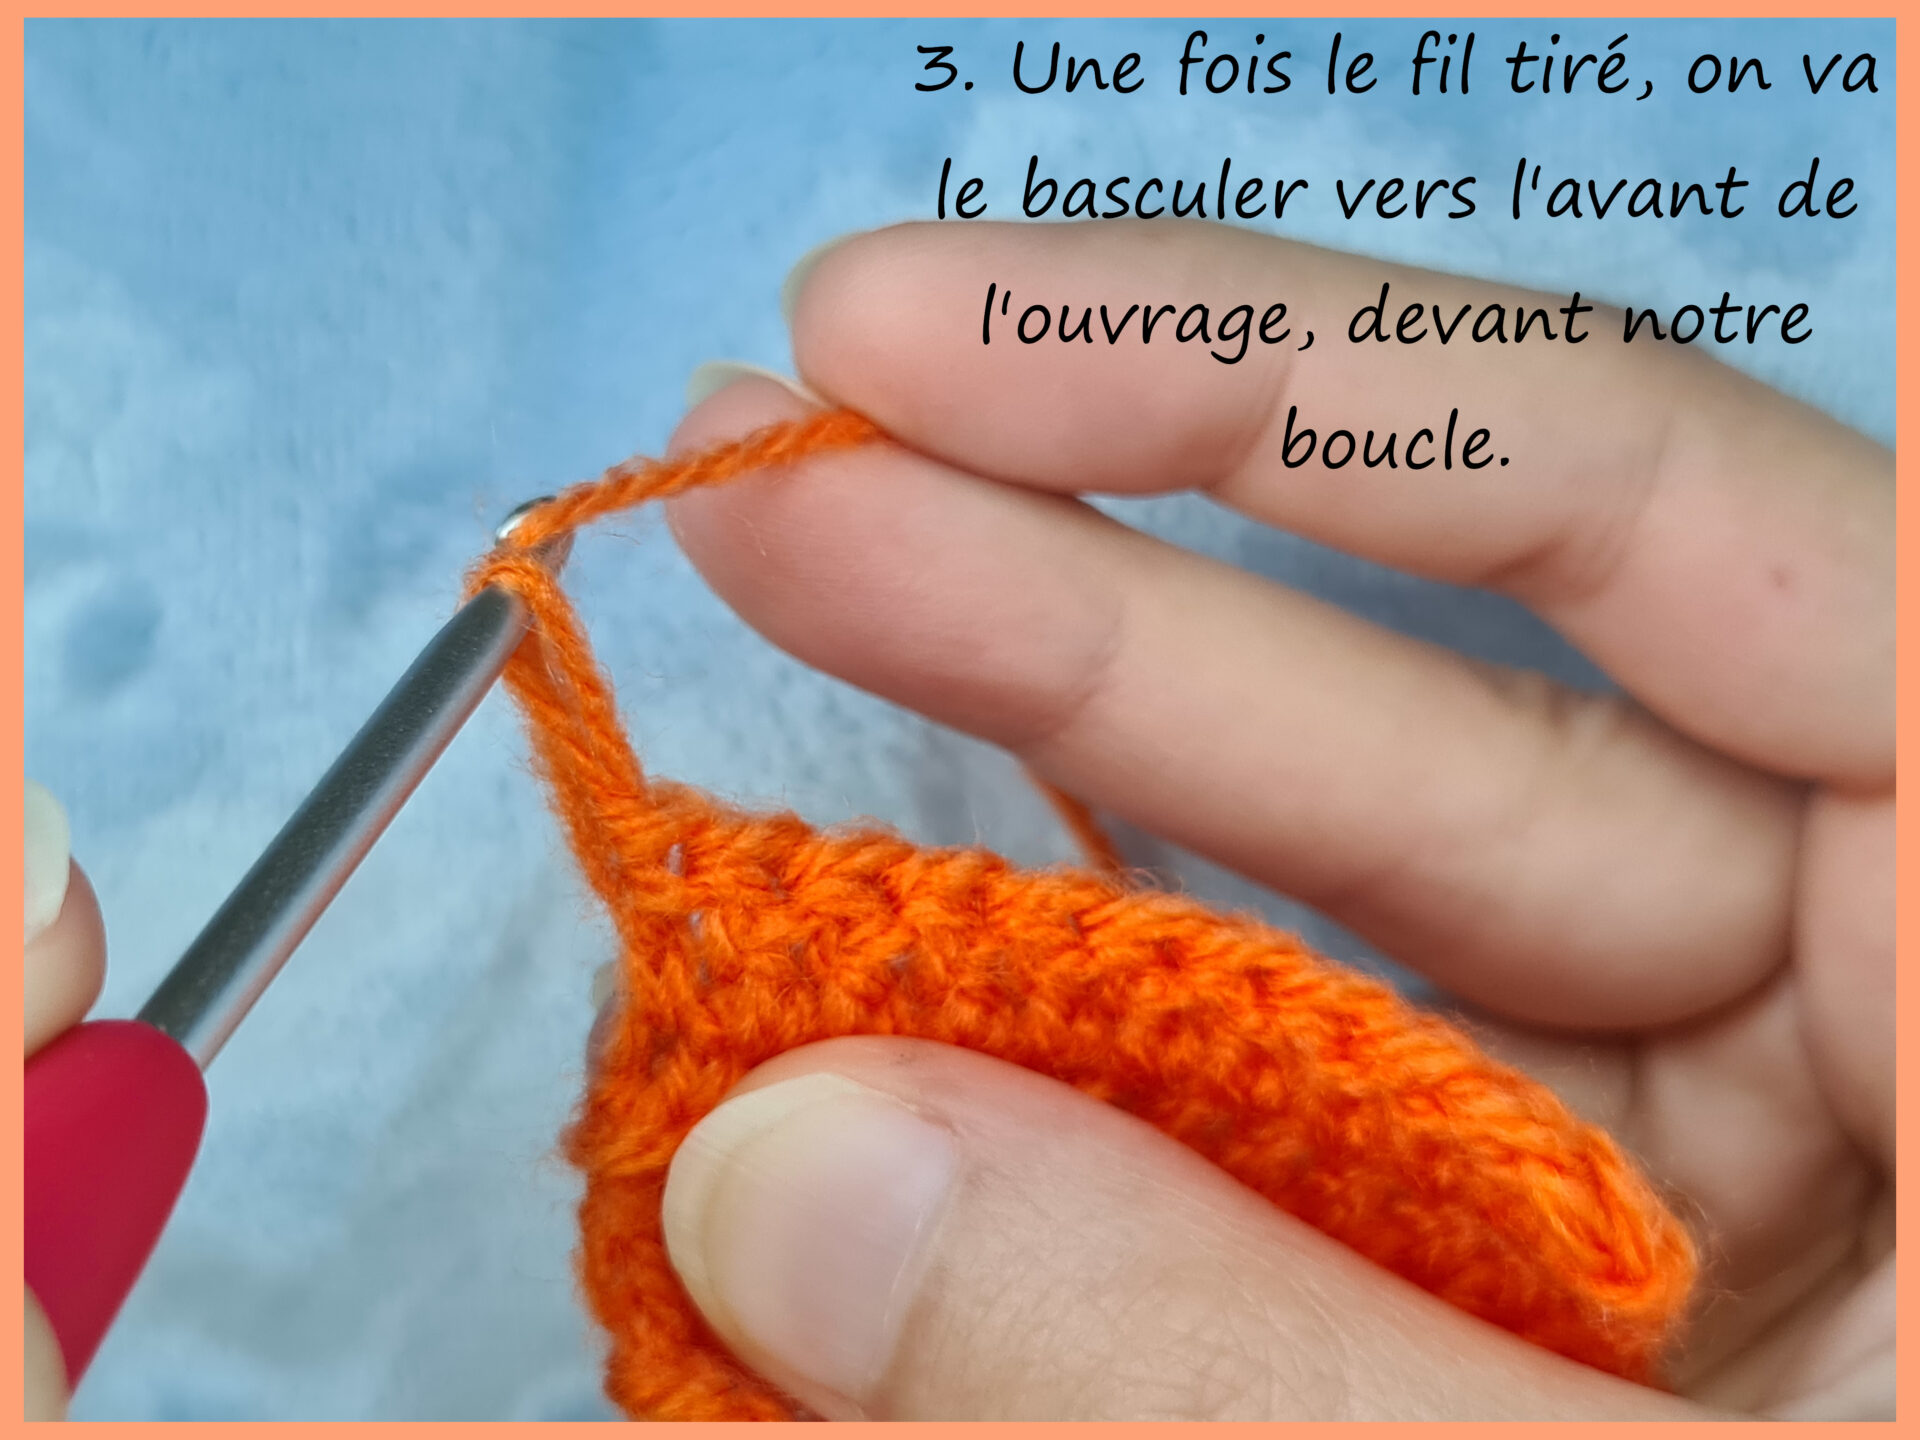
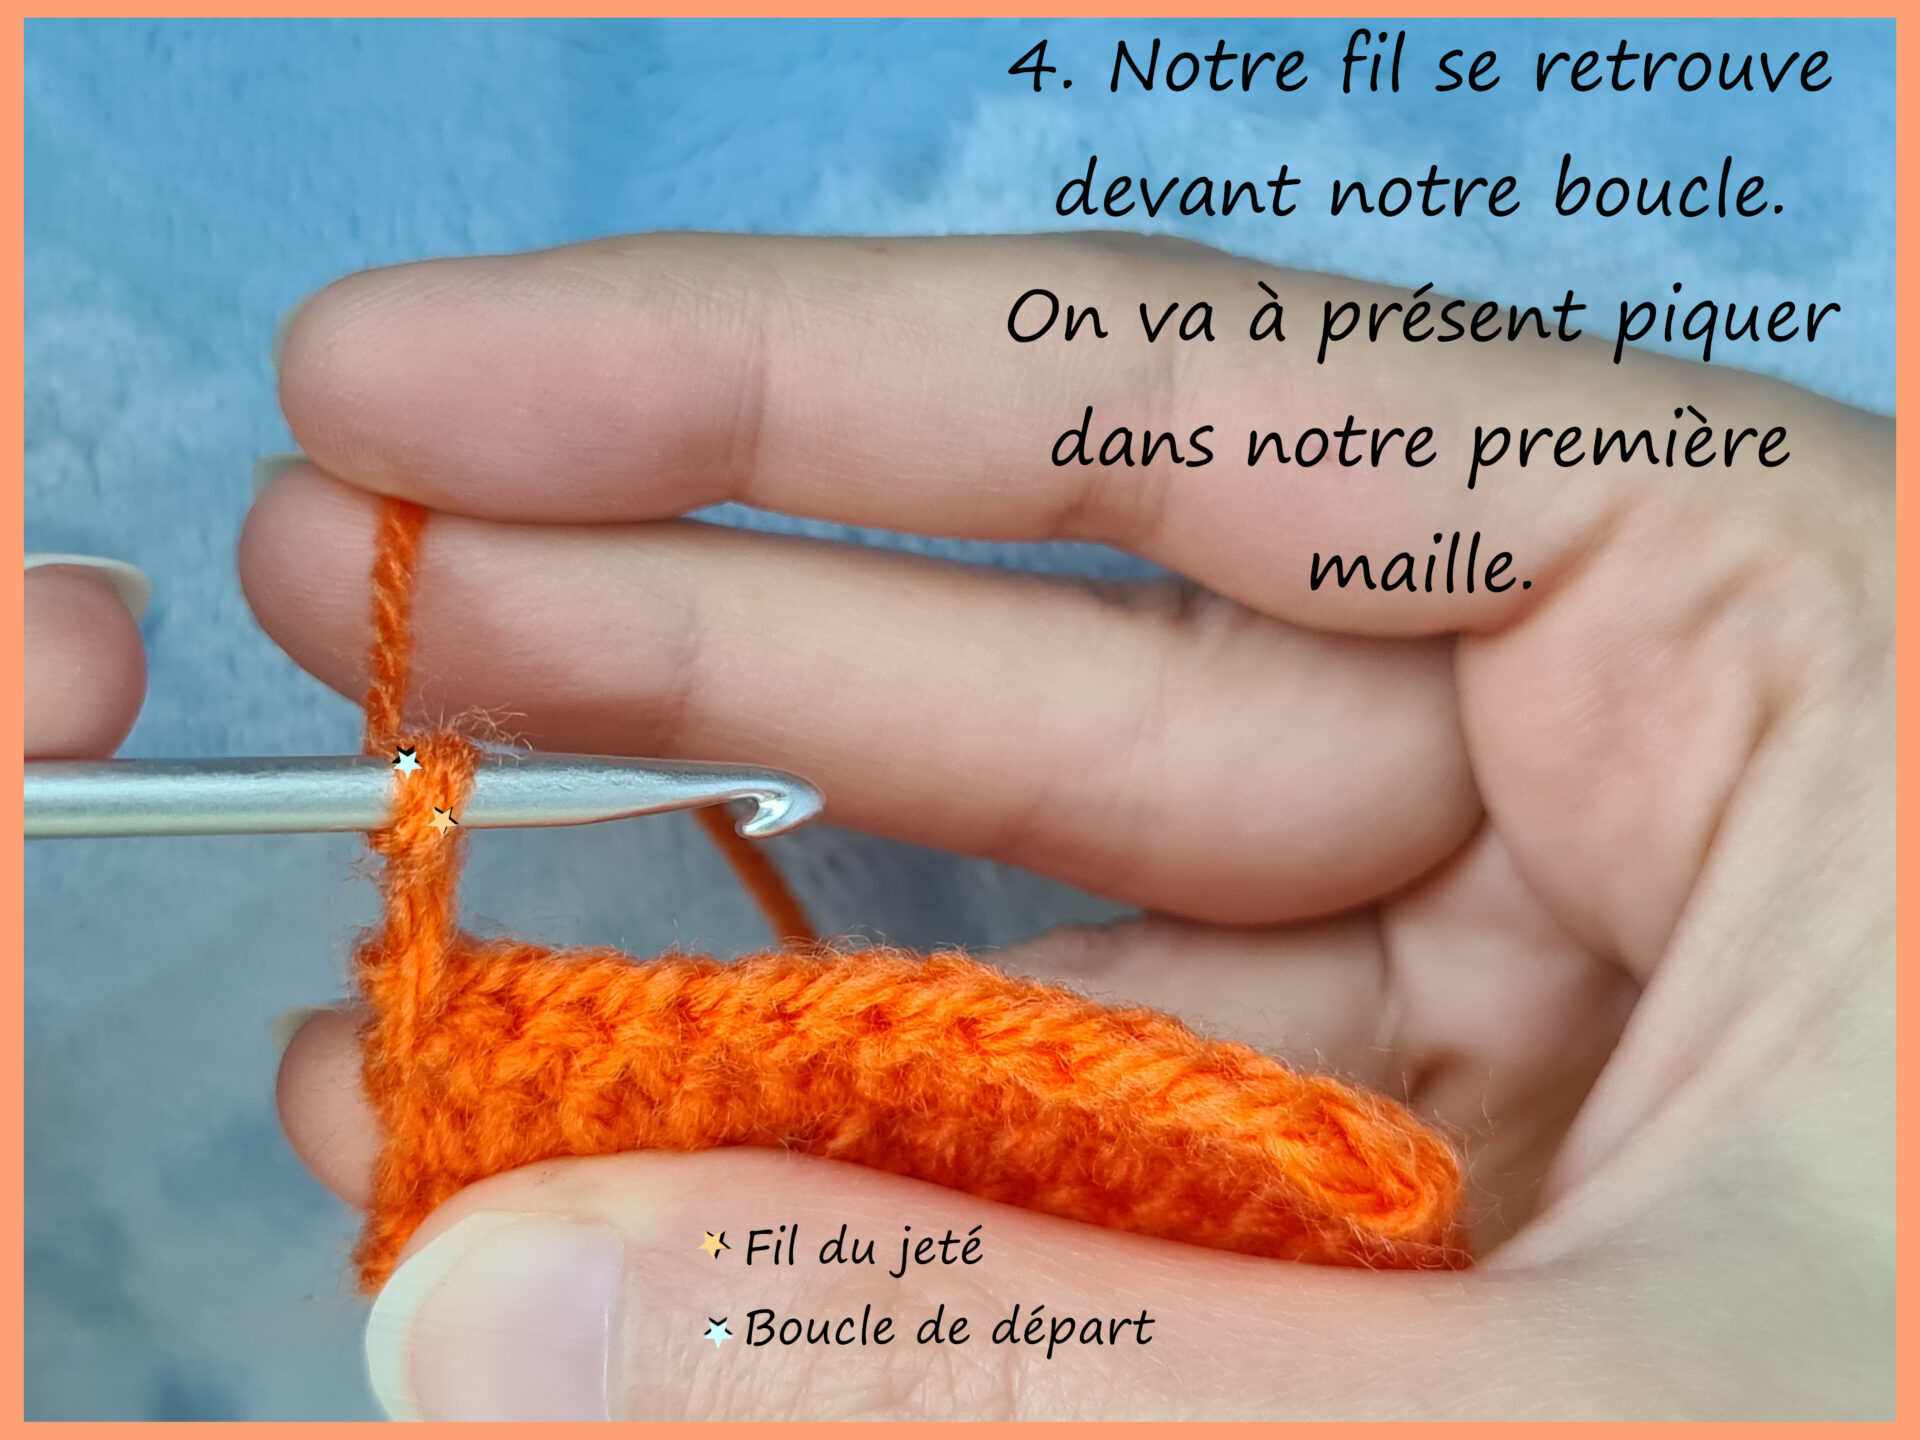
Insert your hook into the first stitch.
⭐Yarn over
🌠 Starting loop
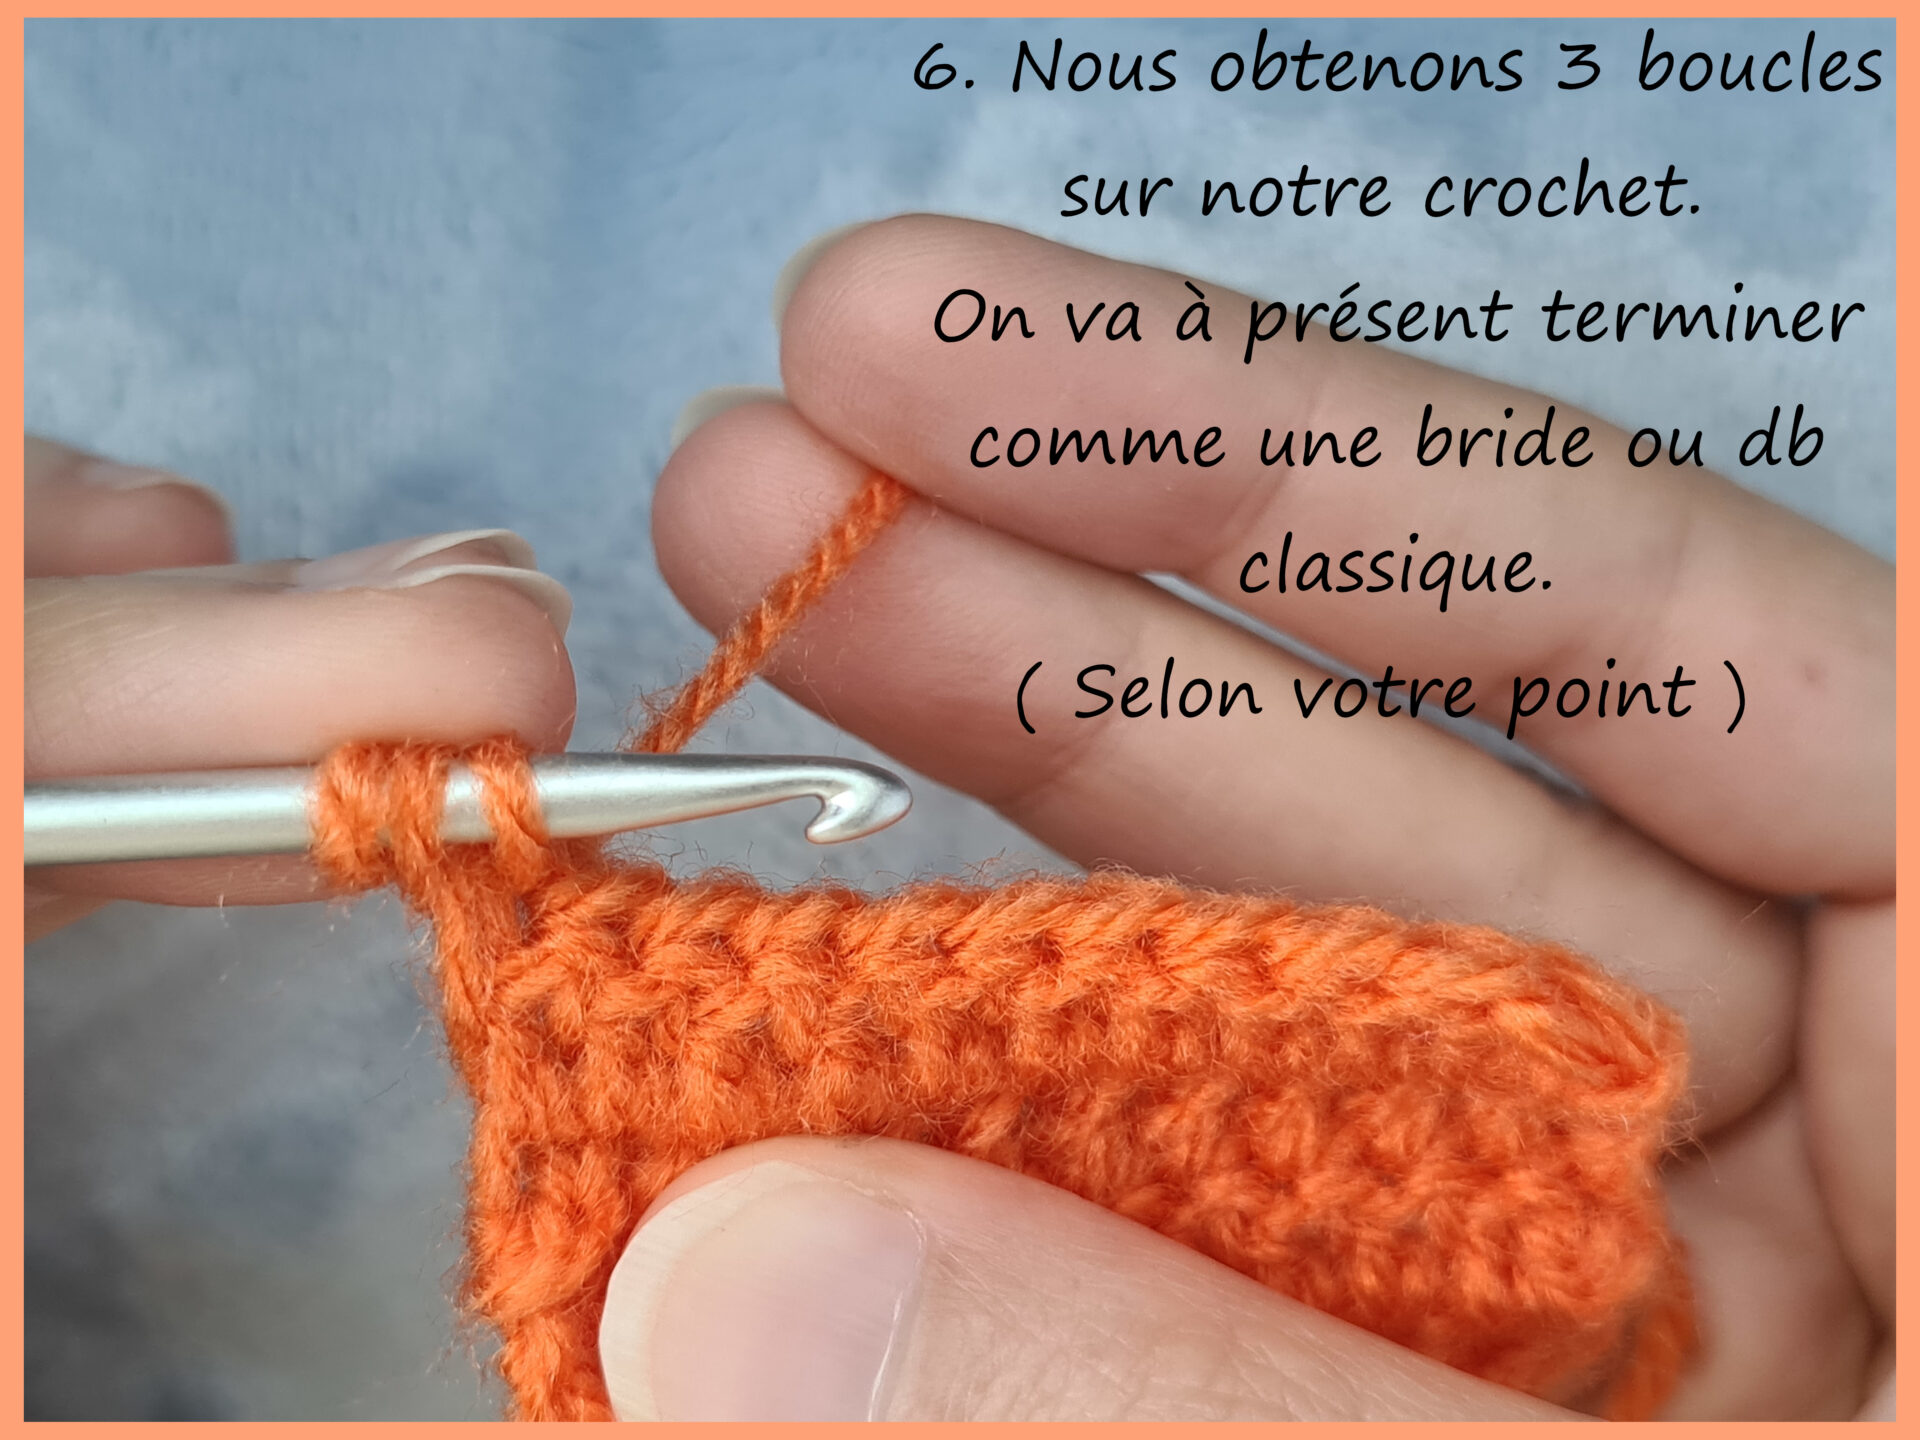
Finish like a regular double crochet or half double crochet (depending on your stitch).
For fun, I also made a short video for this method (it’s more like a little clip than a full tutorial!).
It’s unlisted and only available through this link. (❁´ω`❁)
Feel free to let me know what you think—especially if video format feels more comfortable for you.
Conclusion
And that’s it for this chapter on edge double crochets!
There are still other variations and methods. For example, for Method 2, one variation is to insert your hook into the first stitch—similar to Method 3—which also makes it suitable for hdc.
(I personally find the result less neat.)
And there are plenty more variations out there!
With these ones, you already have a great range of options to create projects with clean, polished edges. (・ω‐)
Happy crocheting everyone!
SeeYouNextTime !
The blog needs your support!
For tips, click on the little cup (´,,•ω•,,)♥

Thank you so much for your support!
Un commentaire à partager ?