

Crochet Lesson #4 : The Magic Ring
In this fourth lesson, we will learn how to make a magic ring, an essential technique for starting most amigurumi.
🇫🇷 Vous préférez lire la version française ? C’est par ici !
Nyaossu !
Here we are — the cornerstone of amigurumi: the magic ring !
Don’t get discouraged if you don’t succeed on your first attempts.
With a little perseverance, the technique will eventually click !
In this lesson we will also use the slip stitch and review the single crochet, two essential stitches for making a magic ring.

1. Wrap the yarn around your finger three times.
2. Insert your hook under the first two strands to catch the third one.
3. Pull the yarn under the other two strands.
4. Then slide your hook into the loop you just formed.
5. Bring the yarn coming from the ball over your hook.
6. Pull it through the loop, tighten it, and remove your finger. 😉
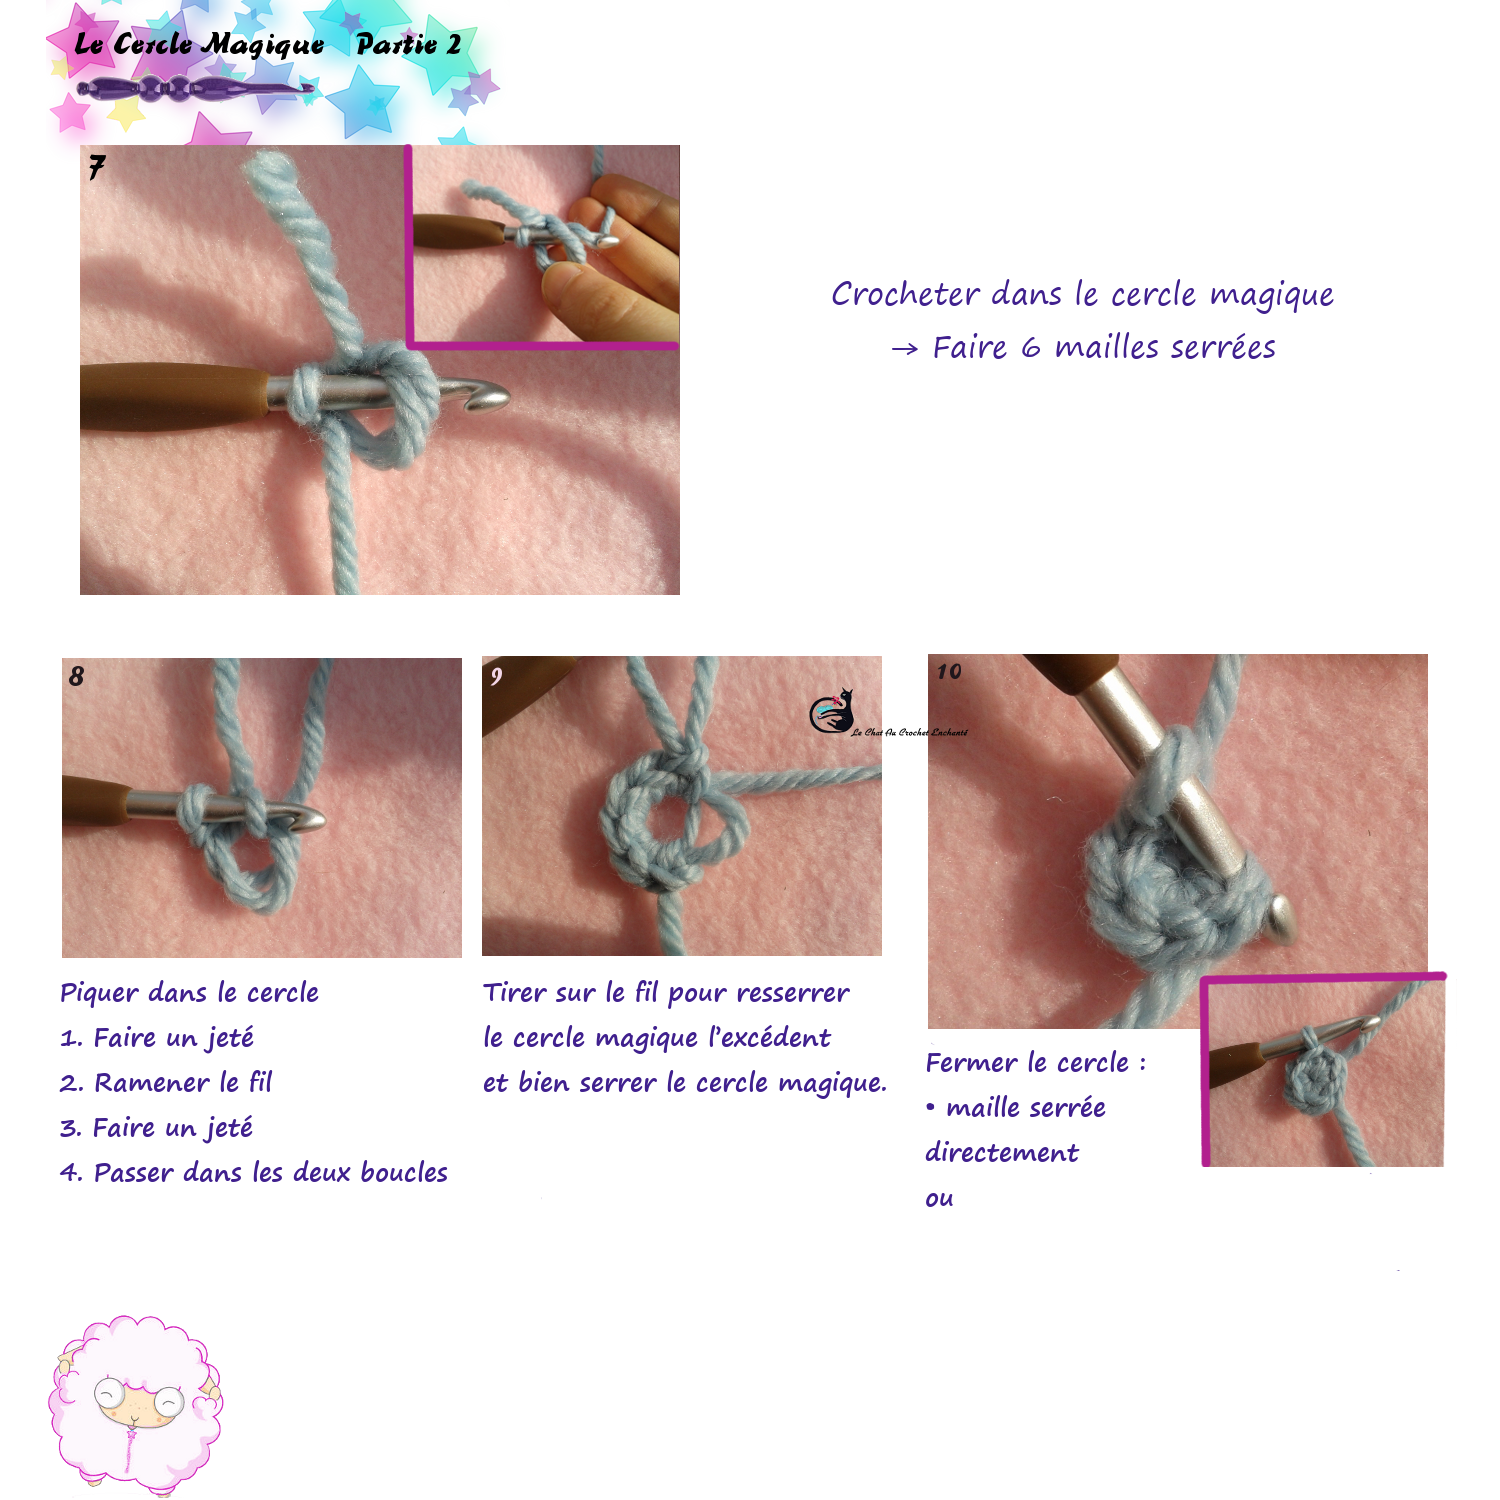
Detailed explanations:
Photo 7
We will now crochet into this ring.
As a general rule, we start with 6 single crochets in the magic ring.
Photo 8
1️⃣ Insert your hook into the ring.
2️⃣ Yarn over and pull up the yarn.
3️⃣ Yarn over again and pull through both loops.
Repeat the process until you have 6 single crochets.
Slip stitch
The slip stitch is very simple to make.
Yarn over and pull the yarn directly through the stitch and the loop already on your hook.
Photo 9
Once your 6 single crochets are completed, remove the magic ring from the hook
(for safety, slightly enlarge the loop).
1️⃣ Gently pull the yarn tail.
One of the two strands will begin to shorten.
2️⃣ Ignore that one and pull on the second strand, from bottom to top, until the ring closes completely.
3️⃣ Finish by pulling the yarn tail to remove the excess yarn and fully tighten the magic ring.
Photo 10
Now you just need to close your ring!
Two methods:
1️⃣ Start directly with a single crochet (working in a spiral)
2️⃣ Or make a slip stitch, then begin in the second stitch
(the last stitch of the round will be worked into the slip stitch used to close the round)
And there you have it — your magic ring is ready!
Next lesson
👉 Lesson n°5 – Changing Colors
The blog needs your support!
For tips, click on the little cup (´,,•ω•,,)♥

Thank you so much for your support!
Un commentaire à partager ?