
Crochet Lesson #6: Half Double Crochet & Double Crochet
In this sixth lesson, we will learn how to make the half double crochet and the double crochet, two taller stitches that allow more variety in crochet shapes.
🇫🇷 Vous préférez lire la version française ? C’est par ici !
Nyaossu! (`・ω・´)ゞ
I would like to write a more technical article about crochet stitches later on, but before that I thought the first step would be to learn how to make them !
A small guide for beginners seemed like the perfect place to start. (。・ω・。)
The second article is planned for next Friday and will be useful for both beginners and more experienced crocheters. (ゝω・)
By the way, let me introduce your teacher for these two lessons :

Back to our stitches !
Depending on the project you want to make, you may need to use stitches other than single crochet, chain stitches, or slip stitches.
Personally, I often use half double crochets and sometimes double crochets in my amigurumi.
They allow stitches of different heights and make it easier to play with shapes.
A quick reminder
I will start from the beginning so that everyone can follow easily.
The basic stitch in crochet is the single crochet, which is made in two yarn overs.
☆ Reminder: yarn over = wrapping the yarn over the hook ☆
First you yarn over to pull up the yarn, then a second yarn over to complete the stitch by pulling the yarn through the two loops on the hook.
If you feel a bit lost, don’t hesitate to revisit the article about single crochet.
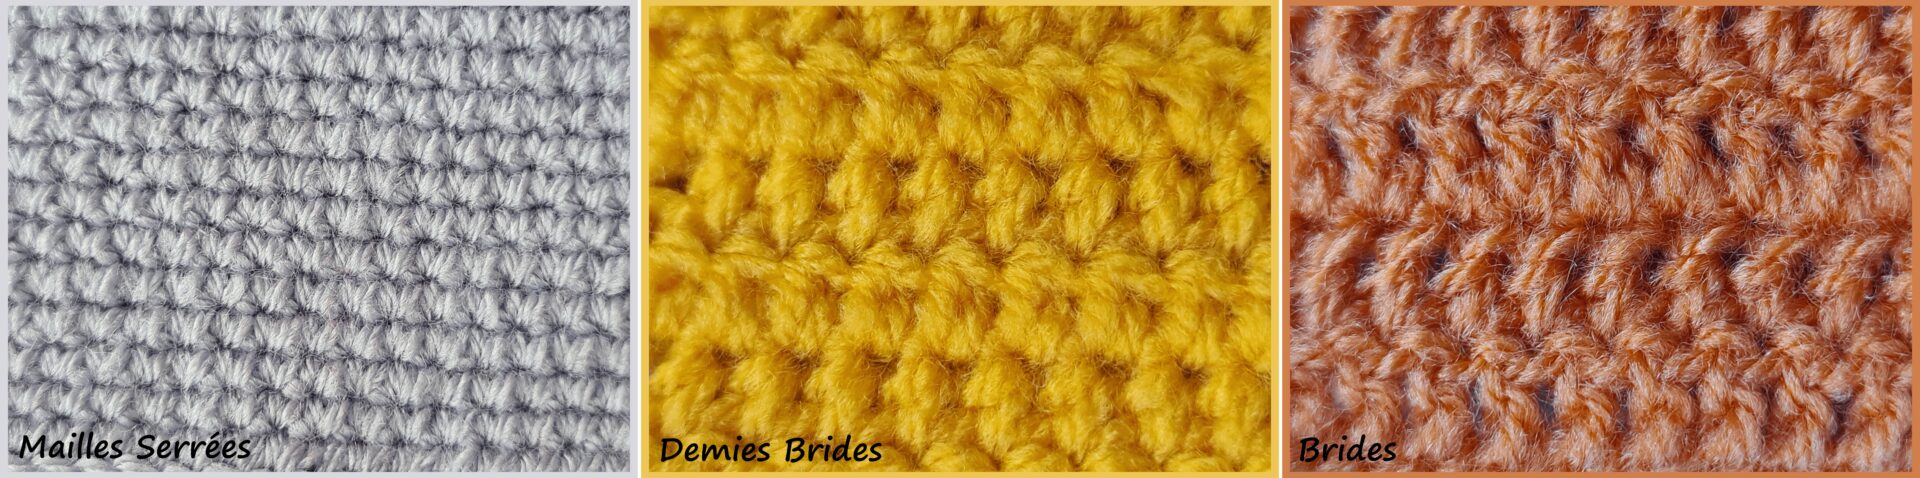
Half double crochet
The half double crochet uses one additional yarn over compared to the single crochet ( 3 yarn overs in total ), making it a slightly taller stitch.
To make it, start with one yarn over before inserting your hook.
This adds an extra loop on the hook.
Then finish the stitch by pulling the yarn through the three loops on the hook.
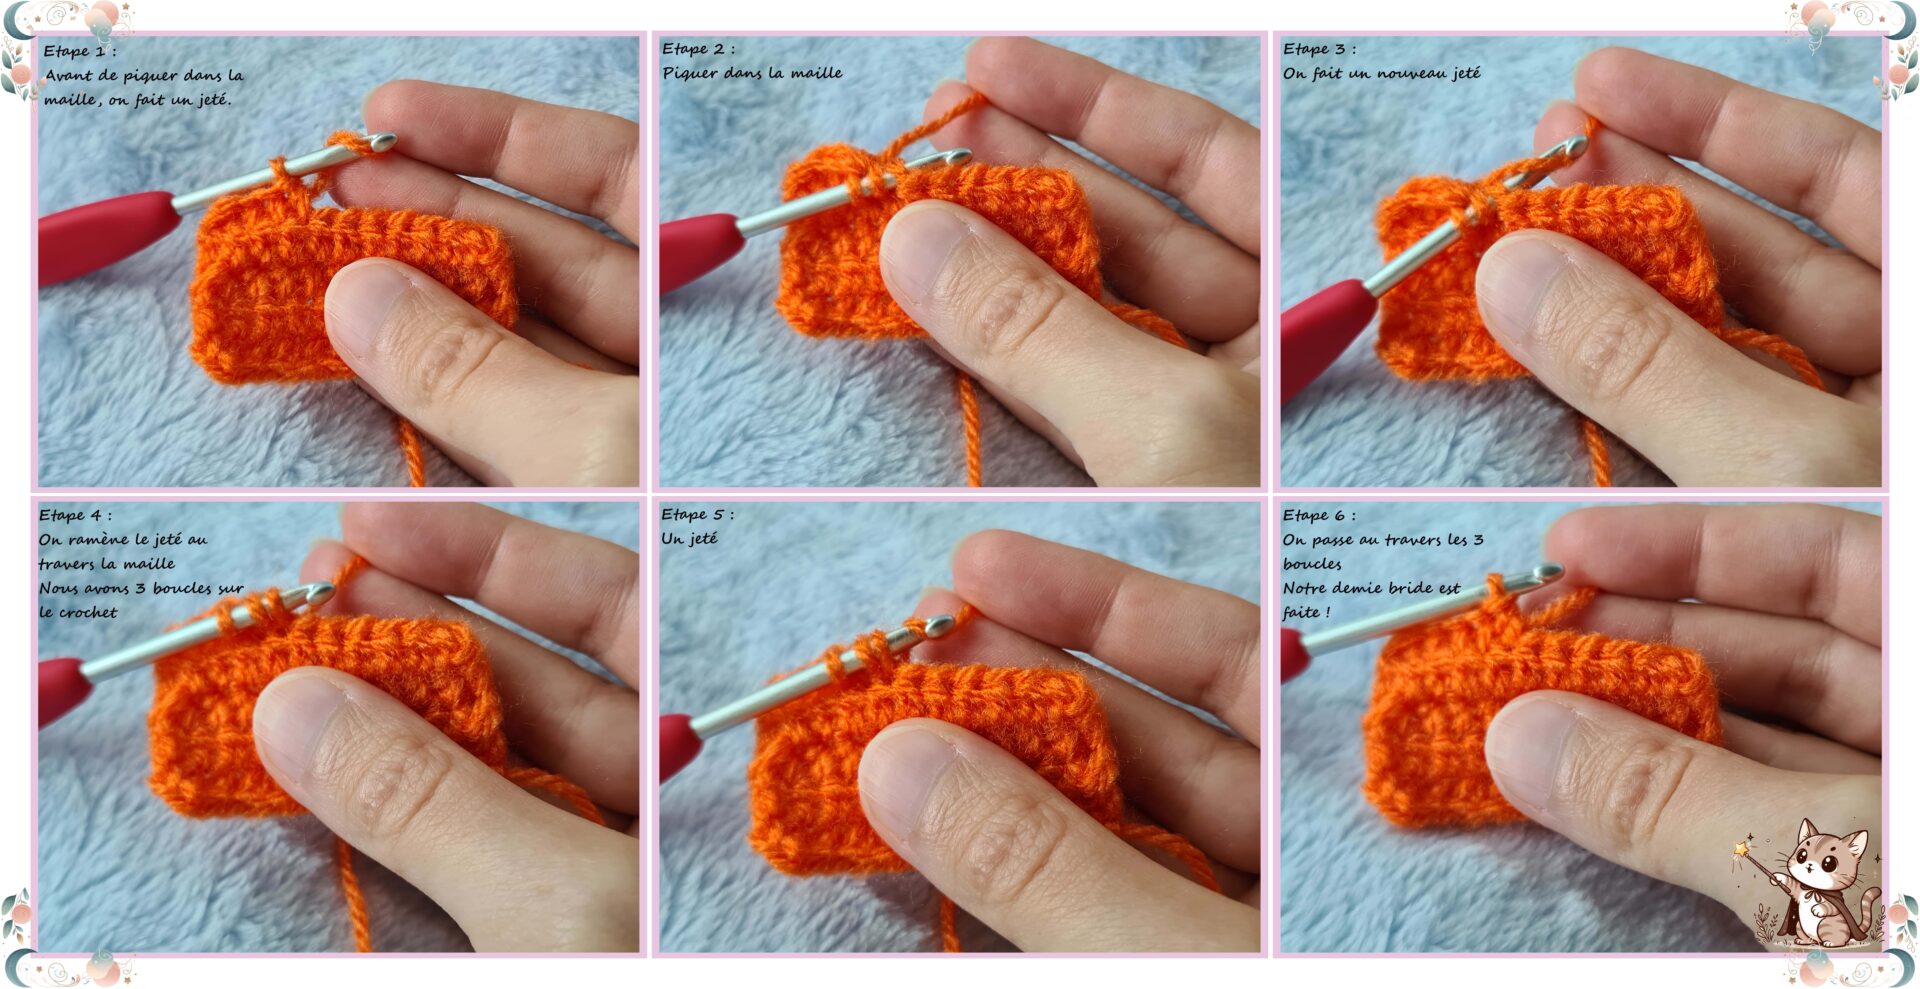
Step 1 : Yarn over before inserting the hook into the stitch.
Step 2 : Insert the hook into the stitch.
Step 3 : Yarn over again.
Step 4 : Pull the yarn through the stitch.
You now have three loops on the hook.
Step 5 : Yarn over once more.
Step 6 : Pull through all three loops.
Your half double crochet is complete!
Double crochet
The double crochet follows the same principle but uses two additional yarn overs compared to the single crochet ( 4 yarn overs in total ).
First make a yarn over before starting the stitch.
Then, instead of pulling through all loops at once like with the half double crochet, you will finish the stitch in two steps:
• Yarn over and pull through two loops
• Yarn over again and pull through the remaining two loops
To avoid overloading this article, I won’t repeat the photos here.
Simply follow the same steps as for the half double crochet, and adjust the last part as explained above. (。・ω・。)
And if you have any questions, the comments are there for that —
feel free to ask! ☆(ゝω・)ノ
Even taller stitches
We can also quickly mention double crochet variations.
By now you probably understand the principle:
we simply add more yarn overs to increase the height of the stitch.
Treble Crochet
The treble crochet begins with two yarn overs on the hook.
Insert the hook into the stitch and pull up a loop.
Then complete the stitch by working the loops two at a time :
• Yarn over and pull through two loops
• Yarn over and pull through two loops again
• Yarn over and pull through the last two loops
This creates a much taller stitch, often used for airy or decorative patterns.
Double treble crochet
The double treble crochet begins with three yarn overs on the hook.
Insert the hook into the stitch and pull up a loop.
Then complete the stitch by working the loops two at a time :
• Yarn over and pull through two loops
• Yarn over and pull through two loops again
• Yarn over and pull through two loops again
• Yarn over and pull through the last two loops
This creates a very tall stitch !
And that’s it!
I hope this little article will be useful to you. ヽ(。ゝω・)ノ
Beginner Crochet Lessons
👉 Lesson #1 – Holding your hook & Learning the chain
Lesson #2 – Single crochet & Working into the foundation chain
Lesson #3 – Increases & Decreases
Lesson #4 – Magic Ring
Lesson #5 – Changing colors
The blog needs your support!
For tips, click on the little cup (´,,•ω•,,)♥

Thank you so much for your support !
Un commentaire à partager ?